Baby Passport Photo Lighting Tips for Parents
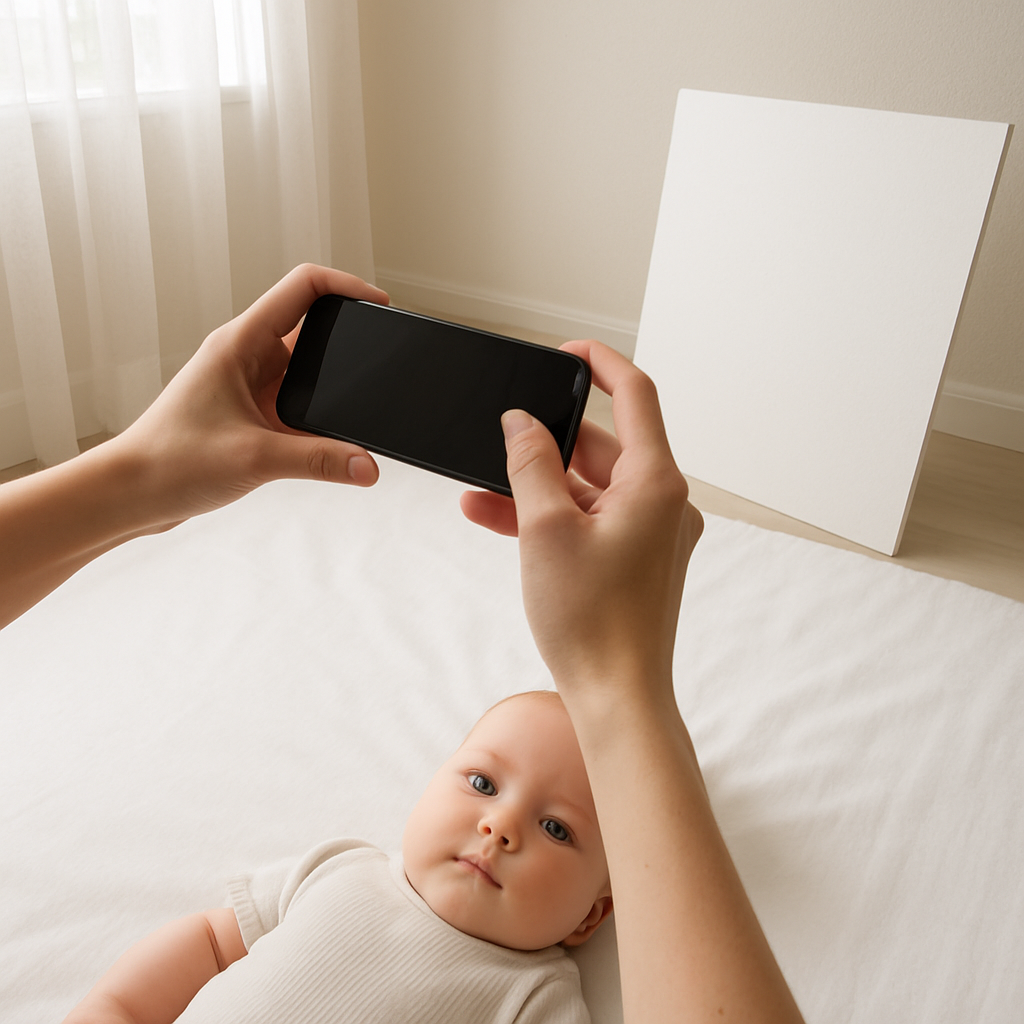
Getting a baby passport photo sounds easy. Place baby down. Take picture. Done. Right?
Not quite.
Lighting can make or break a passport photo, especially for infants. Shadows creep in. Skin tones look strange. Eyes disappear into darkness. And suddenly that "quick photo" turns into a full afternoon project.
Parents often underestimate lighting. They focus on keeping the baby still - which is fair - but forget that proper illumination is what makes the photo acceptable. Passport agencies are strict. Very strict. One shadow under the chin and the image might get rejected.
This guide walks through baby passport photo lighting tips that actually work in real homes. No fancy studio required. Just smart adjustments, patience, and a little know-how.
Why Lighting Matters for Baby Passport Photos
Think of lighting like seasoning in food. Too little and everything looks flat. Too much and it’s overwhelming. The goal is balance.
For baby passport photos, lighting must:
- Be even across the face
- Avoid harsh shadows
- Show natural skin tone
- Keep the background clean and white
- Prevent red-eye or glare
That’s a lot to manage with a wiggly infant.
But here’s the good news - it’s absolutely doable at home when parents understand a few fundamentals.
Natural Light Is Your Best Friend
If there’s one golden rule in baby passport photo lighting, it’s this: use natural light whenever possible.
Window light is soft. Flattering. Gentle. It wraps around the face like a blanket instead of blasting it with harsh brightness.
How to Use Window Light Properly
- Choose a bright room with indirect sunlight.
- Turn off overhead lights to avoid color mixing.
- Position baby facing the window, not sideways.
- Stand between the window and the baby while shooting.
Notice something important? The light should hit the baby’s face evenly. If the light comes from the side, one cheek will glow and the other will sink into shadow. That’s a common reason for passport rejection.
Cloudy days are actually fantastic. Overcast skies act like a giant diffuser in the sky. No sharp lines. No dramatic contrast. Just smooth, balanced light.
Avoid These Common Lighting Mistakes
Parents mean well. They really do. But a few mistakes pop up again and again.
1. Using Direct Flash
Flash creates glare, red-eye, and hard shadows behind the head. It can also make babies squint or cry. Not ideal.
If flash is absolutely necessary, bounce it off a wall or ceiling. But honestly, natural light usually works better.
2. Overhead Lighting Only
Ceiling lights cast shadows under the eyes and chin. The result? A tired-looking baby in a photo meant to represent them for years.
Overhead lighting alone rarely produces passport-quality images.
3. Mixed Light Sources
Ever notice how some photos look slightly yellow or blue? That happens when daylight mixes with indoor bulbs. The camera struggles to balance color temperature.
Pick one light source. Stick to it.
Creating Even Lighting at Home
Not every home has perfect window placement. That’s fine. There are workarounds.
Use Reflectors - No Studio Gear Required
A reflector sounds fancy, but it can be as simple as:
- A white poster board
- A foam board from a craft store
- A clean white sheet
Place it opposite the window to bounce light back onto the baby’s face. This reduces shadows naturally.
It’s like adding a second window without remodeling the house.
Positioning Is Everything
Lay the baby on a white sheet near the window. Make sure the head is flat and facing upward. The camera should be directly above - not at an angle.
Angles distort facial proportions. Passport systems notice.
Flat, centered, evenly lit. That’s the formula.
Lighting for Newborns vs. Older Babies
Age changes the game slightly.
Newborn Lighting Tips
- Lay them down on a white background.
- Shoot during nap time when they’re calm.
- Use soft window light from above their head.
- Avoid blankets that cast colored reflections.
Newborn skin is delicate and can appear blotchy under harsh light. Softness is key.
Older Baby Lighting Tips
- Sit them upright against a plain white backdrop.
- Make sure light hits both sides of the face equally.
- Remove distracting toys before shooting.
Older babies move more. That means parents may need faster shutter speeds. Brighter environments help freeze motion without sacrificing clarity.
What About Artificial Lighting?
Sometimes natural light just isn’t available. Maybe it’s nighttime. Maybe the weather refuses to cooperate.
Artificial lighting can work, but it must be controlled.
Best Artificial Setup
- Use two soft light sources.
- Place them at 45-degree angles on both sides.
- Ensure both lights have the same color temperature.
- Avoid placing lights too close to prevent glare.
Softboxes are ideal. But even lamps with daylight bulbs and diffusers can work in a pinch.
The goal remains the same - even illumination, no harsh shadows, natural skin tone.
Checking Lighting Before Submitting
Here’s a practical trick. After taking the photo, convert it to black and white temporarily. Why?
Shadows become obvious without color distraction. Uneven patches stand out immediately.
Zoom in on:
- Under the chin
- Behind the ears
- Under the nose
- Around the eyes
If dark areas dominate any side of the face, adjust and retake.
Sounds tedious. It’s better than a rejection notice weeks later.
Using Online Tools to Perfect Baby Passport Photos
Even with perfect lighting, cropping and formatting must meet official requirements.
This is where professional tools help.
Services like BabyPassportMaker.com guide parents through sizing, background adjustments, and compliance checks. Instead of guessing whether the image meets passport standards, parents can upload the photo and let the system refine it.
It saves time. And frustration.
Lighting still matters, of course. No tool can fully fix extreme shadows or blown-out highlights. But when the base image is well-lit, optimization becomes simple.
Quick Lighting Checklist for Parents
Before snapping that final shot, run through this checklist:
- Is the light soft and even?
- Are there zero harsh shadows on the face?
- Is the background bright and neutral?
- Are overhead lights turned off?
- Is flash disabled?
- Does the skin tone look natural?
If the answer is yes across the board, the photo is likely on the right track.
Patience Makes All the Difference
Babies are unpredictable. One minute calm. The next minute chaos.
Parents should plan the session around feeding times and naps. A comfortable baby equals better posture, better expression, and fewer lighting struggles.
Sometimes it takes ten shots. Sometimes thirty. That’s normal.
The key is staying calm. Babies sense stress. And stressed babies rarely cooperate with photography.
Final Thoughts on Baby Passport Photo Lighting
Lighting isn’t just a technical detail. It’s the foundation of a successful baby passport photo.
When parents prioritize soft, even illumination, they eliminate the biggest reason for application delays. No harsh shadows. No color distortion. No unnecessary retakes.
Natural window light, thoughtful positioning, and a clean white background do most of the heavy lifting. Add a reliable formatting service like BabyPassportMaker.com, and the process becomes far less intimidating.
Simple adjustments. Big difference.
And honestly, when the passport arrives without issue, that small effort feels completely worth it.