How to Take a Compliant Newborn Passport Photo at Home
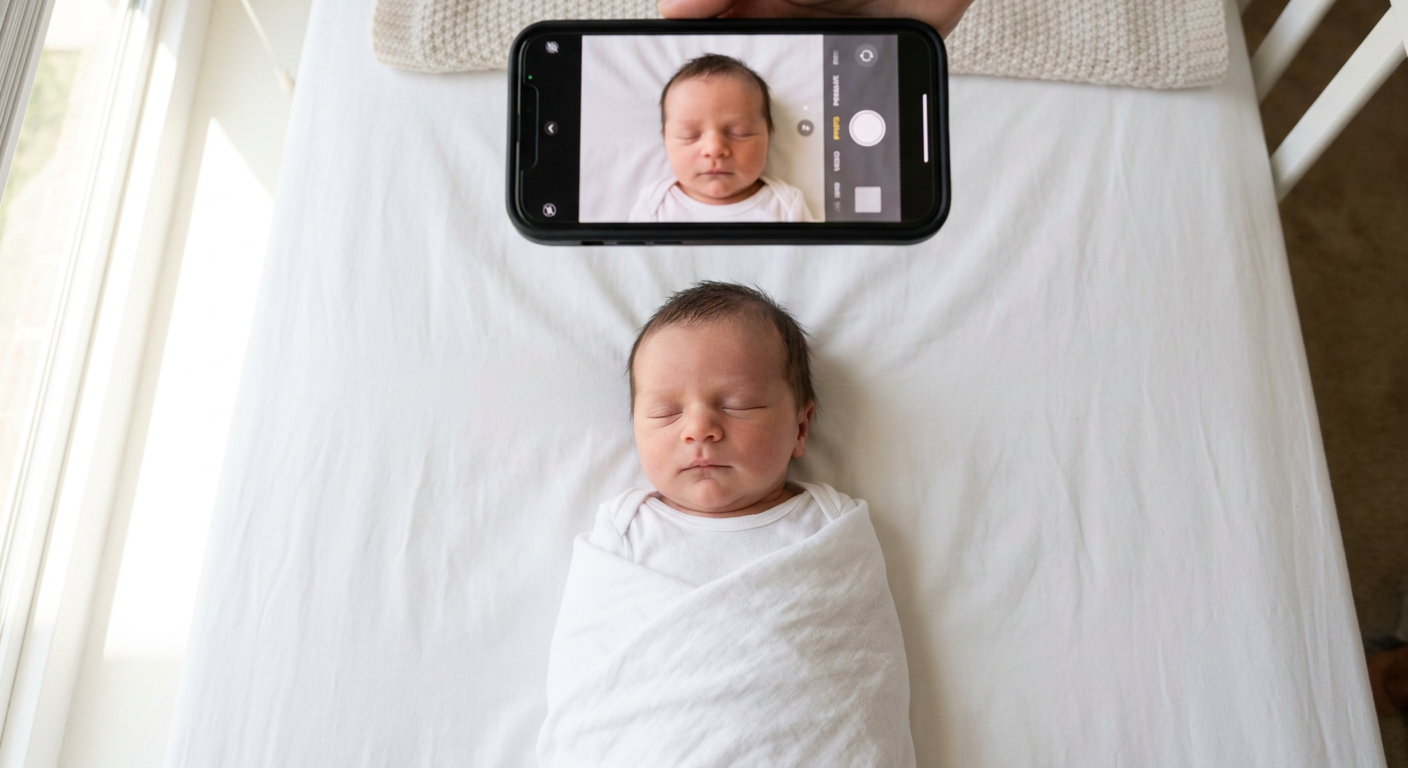
Most parents expect a quick trip to the pharmacy to get a newborn passport photo, only to find themselves holding an uncooperative baby under fluorescent lights while a clerk tries to time a digital camera between cries. Taking an infant to a studio or retail kiosk is not a legal requirement. You can capture a fully compliant image at home with a smartphone, provided you meet strict government specifications for lighting, background, and facial proportions. "The system rejected the image" is a common frustration, but it is entirely avoidable when you control the physical environment and understand exactly what the passport office's automated software is scanning for.
Quick Summary
Capturing a compliant newborn passport photo at home requires meeting strict official government standards for background neutrality, lighting, and facial symmetry. Controlling the capture environment and timing the photo around the infant's sleep schedule allows parents to avoid studio logistics while ensuring the image passes automated passport office checks. * Use diffuse natural window light to eliminate rejection-triggering shadows across the face. * Lay the infant flat on a plain white or light gray sheet to stabilize the head. * Ensure both eyes are open, with a neutral expression and no visible hands or props in the frame. * Shoot from a distance to avoid lens distortion, leaving ample space for digital formatting.
Table of Contents
- 1. Setting the lighting and background
- Overhead household lighting creates rejection-triggering shadows
- 2. Positioning the infant safely
- Gravity provides stability without visible props
- 3. Timing the capture and managing expressions
- Managing reflexes and locking camera focus
- 4. Framing and spacing the shot
- Wide lenses distort facial geometry at close range
- 5. Processing and securing the final print
- Retail software fails to format flat captures correctly
- Common Pitfalls & Troubleshooting
- Fabric wrinkles triggering background failures
- Background shadows simulating facial hair
- Red-eye from internal flash
- The missing ear and facial asymmetry
- FAQ
- Can an infant's eyes be closed in a passport photo?
- Are hands allowed in an infant passport photo?
- Can I use a car seat to take the photo?
- Does the photo need to be printed on special paper?
- Recommended Reads
1. Setting the lighting and background
Overhead household lighting creates rejection-triggering shadows
The first hurdle in meeting infant passport photo requirements is achieving flat, even lighting. Government scanners reject photos with heavy shadows under the chin, across the cheeks, or on the background directly behind the baby. When you rely on overhead household bulbs, the light falls directionally and creates these distinct shadows. Furthermore, mixing artificial ceiling lights with natural window light confuses a smartphone camera's automatic white balance. The internal sensor struggles to correct the conflicting color temperatures, resulting in a yellow or blue color cast that alters the natural skin tone and fails compliance checks.
To avoid this, rely entirely on diffuse daylight. Position the baby parallel to a large window during the middle of the day, ensuring the sun is not streaming directly through the glass onto their face. The light must wash evenly over the infant. If one side of the face remains slightly darker, place a piece of white poster board on the shadowed side to bounce the ambient window light back onto the skin.
The background must be plain, untextured, and either white or light gray, depending on the destination country's rules. A tightly stretched bedsheet or a large piece of matte poster board placed on the floor works best. Do not use blankets with visible weaves, patterns, or creases. The mistake most people make here is laying a standard sheet on a carpeted floor without pulling it taut. This leaves tiny fabric wrinkles that show up in the final frame and trigger a manual rejection for an obstructed background.
2. Positioning the infant safely
Gravity provides stability without visible props
A compliant image requires the subject to face the camera directly, with both ears equally visible and the head perfectly vertical. Newborns lack the neck strength to sit up and support their own heads, making traditional seated photography nearly impossible. Searching for a "passport photo for infant near me" often leads to retail locations that expect the child to sit independently on a stool or require a parent to hold them up, which almost always introduces a hand or a deep shadow into the frame.
The mechanics of infant photography rely on gravity. Placing the infant flat on their back on a hard floor allows their head to rest securely against the background. If the floor is cold, the infant may trigger the Moro reflex - a biological startle response where they throw their arms up, distorting their shoulder line and covering their neck. Warm the sheet briefly in a dryer before laying them down to keep their posture relaxed. If the baby's head tends to roll to one side, place tightly rolled hand towels underneath the background sheet on either side of their head. This creates a subtle cradle that keeps the face pointed straight up toward the ceiling.
Practical rule: If you can see your hands, a pacifier, or a supporting towel in the camera frame, the passport office will reject the photo. Keep all physical supports completely hidden beneath the background fabric.
The common mistake in this step is the shooting angle. Parents often stand over the baby and lean forward, taking the picture from a slant. The camera lens must be perfectly parallel to the infant's face. If you shoot from too low, the nostrils dominate the frame; if you shoot from too high, the forehead appears disproportionately large.
3. Timing the capture and managing expressions
Managing reflexes and locking camera focus
Official guidelines demand a neutral expression, a closed mouth, and open eyes looking directly at the lens. This is the hardest standard to meet when photographing a newborn. While some jurisdictions offer slight leniency for infants under one year old regarding a perfectly closed mouth, the eyes must be open and entirely visible. A sleeping baby, or a crying baby with a wide-open mouth and scrunched eyes, will fail the screening process.
The mechanism for securing a compliant expression involves timing the session immediately after a nap and a feed, before the infant becomes overstimulated. You have a brief ten-to-fifteen-minute window where a newborn is alert, content, and likely to stare blankly. Hold a high-contrast toy or simply tap the edge of the smartphone directly next to the lens to draw their gaze. Do not make sudden noises or exaggerated faces to get their attention, as this triggers a wide smile or a surprised expression.
The technical mistake people make is failing to lock the smartphone's focus. When shooting downward against a flat white sheet, the camera's autofocus often hunts for contrast and blurs the face. Tap and hold the baby's face on your smartphone screen until the "AE/AF Lock" indicator appears. This fixes the exposure and focus entirely on the facial features. Furthermore, do not take a video and try to extract a single frame. Video frames are heavily compressed and suffer from motion blur, dropping the image quality below the 600 dpi resolution threshold required by most agencies. Use the burst mode on your still camera setting instead to capture multiple high-resolution images per second.
4. Framing and spacing the shot
Wide lenses distort facial geometry at close range
Every government sets strict millimeter dimensions for the printed photo and specific proportions for the head within that frame. For instance, reading an Australian passport photo infant guide reveals that the application requires the image to be 35mm to 40mm wide and 45mm to 50mm high, with the distance from the bottom of the chin to the crown of the head measuring precisely between 32mm and 36mm.
You cannot achieve these millimeter-perfect dimensions manually in the smartphone camera viewfinder. The mechanism of a successful capture is shooting wide. Frame the shot so the infant's head occupies only the middle third of the screen, leaving plenty of empty background above the head, below the shoulders, and on both sides. This buffer space is absolutely necessary for the final formatting process.
The most frequent mistake parents make is zooming in tightly on the face to make it look like a finished passport photo. Smartphone cameras use wide-angle lenses by default. When you move the physical camera closer to fill the frame, the lens introduces barrel distortion. This optical effect makes the nose look disproportionately large, bows the cheeks outward, and pushes the ears back out of sight, resulting in a rejection for altered facial geometry. Stand at least three to four feet away from the baby. If your phone has a dedicated optical telephoto lens, you can use it to compress the image slightly, but never use digital zoom. Pinching the screen to zoom artificially degrades the pixel count. Shoot wide, maintain a flat physical distance, and rely on post-processing software to handle the exact cropping later.
5. Processing and securing the final print
Retail software fails to format flat captures correctly
Once you have a well-lit, correctly framed raw image, it must be formatted to the exact national specifications before submission. Taking the raw smartphone image straight to a pharmacy kiosk is a frequent point of failure. While many parents assume an infant passport photo walgreens service or a similar high-street pharmacy kiosk will automatically handle the compliance checks, retail printing software is explicitly designed to detect adults sitting vertically against a studio backdrop. The automated crop algorithms routinely fail to recognize an infant's face photographed flat against a floor, resulting in an off-center print that the passport office will reject.
The final step requires dedicated digital processing. Software must scale the head to the exact chin-to-crown ratio, perfectly center the eyes on the horizontal axis, and format the output as a high-resolution 600 dpi file. For a new born passport application submitted online, the digital file must meet specific pixel dimensions and kilobyte weight limits without suffering from heavy compression artifacts. If submitting a paper application, the software must generate a 4x6 inch grid containing multiple perfectly sized images for physical printing.
Do not use standard photo editing apps to alter the baby's appearance. Removing blemishes, smoothing skin, or manually erasing the background with generic digital brushes alters the image data in ways that digital fraud-detection scanners instantly flag. Use dedicated formatting tools that adjust the dimensions while preserving the original EXIF metadata. Once properly formatted, you can print the resulting 4x6 grid at any local photo lab on high-quality matte or glossy photographic paper. Never use standard home inkjet printer paper, which lacks the chemical coating required by passport laminating machines and will be rejected immediately.
Common Pitfalls & Troubleshooting
A rejected application delays travel plans by weeks. "The photo was rejected" is not a diagnosis - four different things go wrong here and they need different fixes. Background fabric wrinkles are the most common real cause, but all of these issues look like an immediate failure to an automated scanner.
Fabric wrinkles triggering background failures
Symptom: The photo fails the initial automated scan for newborn passport photo requirements due to "unacceptable background" or "background interference." The Fix: Automated scanners look for a completely uniform field of color behind the head. A loose sheet placed over a soft mattress introduces deep shadows in the folds, which the software reads as physical objects or textures in the background. This is the most frequent reason home photos fail. The fix is moving the baby to a hard surface. Tape the edges of the poster board or bedsheet down flat to the floor, ensuring there is absolutely no slack or bunching beneath the infant's shoulders.
Background shadows simulating facial hair
Symptom: The passport office rejects the photo for "obscured features" or "altered jawline," even though the face looks clear to the naked eye. The Fix: Look closely at the jaw and neck. If the primary light source was positioned above the top of the baby's head, a dark, heavy shadow falls over the neck and upper chest. Government software interprets this heavy contrast as an altered jawline, a scarf, or even facial hair. The fix requires changing the light direction. Move the baby so the diffuse window light washes across the face evenly, or place a white reflector board just out of frame beneath the chin to bounce ambient light back up onto the neck.
Red-eye from internal flash
Symptom: The infant's pupils appear red, unnaturally bright white, or obscured by a harsh glare. The Fix: This happens when a smartphone's built-in LED flash fires directly into the retina. You are strictly forbidden from digitally removing the red-eye effect using editing software; any altered eye pigmentation results in a permanent ban of that image. The real cause is shooting in a room that is too dark, prompting the camera to trigger the flash automatically. The only fix is to disable the flash entirely in your camera app settings and move the photoshoot to a brightly lit room during daylight hours.
The missing ear and facial asymmetry
Symptom: The image is rejected for "head not centered" or "facial asymmetry." The Fix: This occurs when a second parent or sibling tries to entertain the baby from the side of the room while the photographer takes the picture. The infant naturally rotates their head to track the sound, hiding one ear from the camera lens and breaking the required symmetry. To fix this, banish all distractions from the periphery of the room. The only person making noise should be the one holding the camera, tapping an object directly adjacent to the lens to keep the gaze pointed straight up.
FAQ
Can an infant's eyes be closed in a passport photo?
No. While some countries allow a slight opening of the mouth for newborns who cannot control their jaw muscles, the eyes must be open and clearly visible to the camera. If your baby is sleeping, you cannot manually open their eyelids; you must wait until they wake up naturally to take the photograph.
Are hands allowed in an infant passport photo?
No hands, from either the parent or the baby, can be visible in the final cropped image. The parent's hands must remain completely hidden underneath the background fabric if they are supporting the head. The baby's hands must be kept down by their sides, outside of the required facial framing area.
Can I use a car seat to take the photo?
Yes, you can place the infant in a car seat, provided you drape a plain white or light gray sheet completely over the seat fabric first. You must ensure all safety straps, buckles, and padded headrests are hidden beneath the sheet or pulled completely out of the frame so they do not appear behind the baby's head.
Does the photo need to be printed on special paper?
Yes. If you are submitting a physical paper application, the final image must be printed on high-quality, specialized photographic paper. Depending on the specific country's rules, this will be either matte or glossy paper. Standard printer paper or low-resolution home inkjet prints will be rejected immediately by the processing facility.