How to take baby passport photo for 1 month old
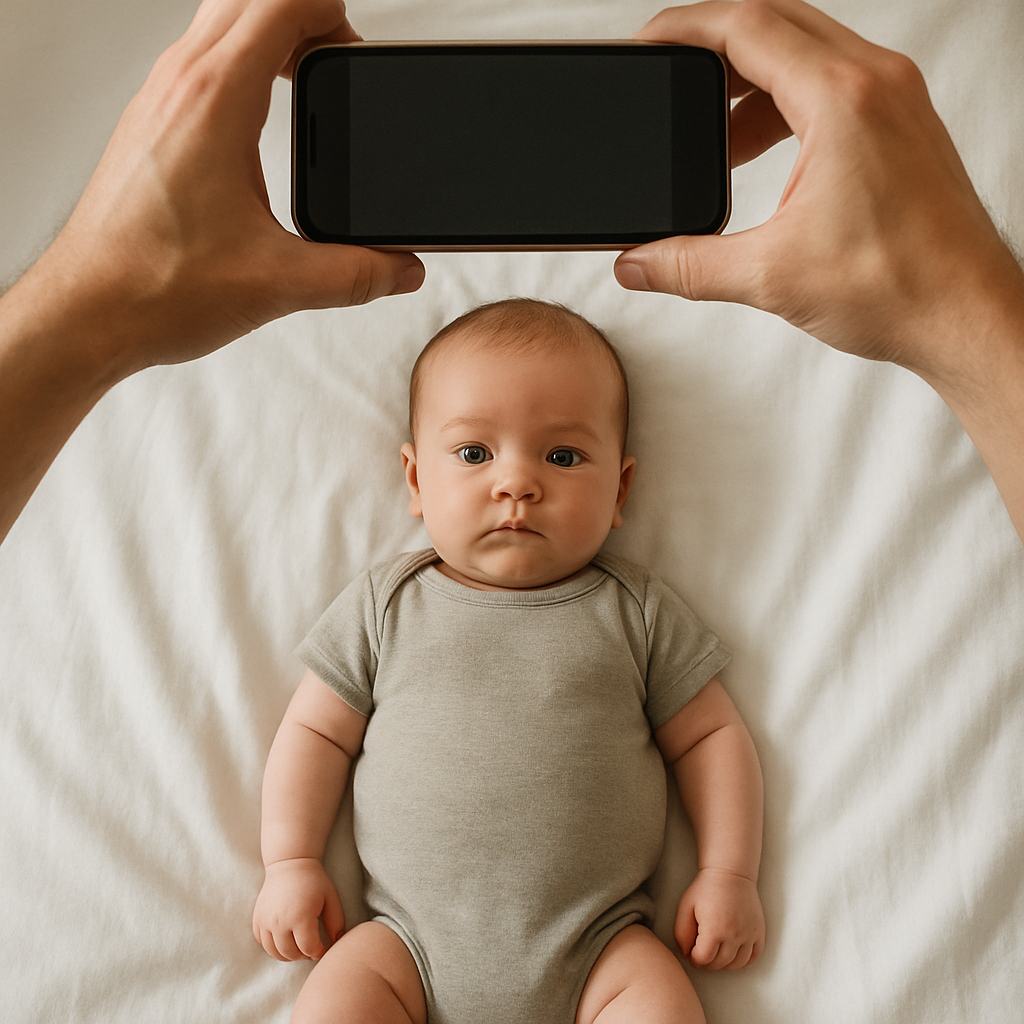
Taking a passport photo for a one-month-old baby sounds simple. Until it isn’t. Anyone who has ever tried to photograph a newborn knows the truth - babies have their own schedule, their own moods, and absolutely no interest in government photo requirements. Still, the photo has to be perfect. Neutral expression. Eyes open. Plain background. No shadows. No hands in frame. Sounds easy, right? Not quite. But it is doable - and without losing sanity. This guide breaks down exactly how to take a baby passport photo for a 1 month old, step by step, with practical tips that actually work.
Understanding Baby Passport Photo Requirements
Before grabbing a camera, it helps to know what authorities expect. A baby passport photo follows many of the same rules as adult photos, just with a bit more flexibility. Here’s what matters most:
- Plain white or off-white background
- Baby facing the camera directly
- Eyes open (yes, even at one month)
- No visible hands, toys, pacifiers, or shadows
- Neutral facial expression
- Correct photo size - typically 2x2 inches in the U.S.
No smiling. No cute headbands. No artistic angles. It’s more mugshot than baby portrait. And that’s okay.
Why Newborn Passport Photos Are Tricky
A one-month-old doesn’t sit upright. They wobble. They blink. They squint at random light sources. Sometimes they stare into space like tiny philosophers. That unpredictability is the main challenge. Newborns also:
- Have limited neck control
- Fall asleep without warning
- Move their arms constantly
- React strongly to lighting changes
So the strategy must adapt to them - not the other way around.
Step-by-Step: How to Take a Baby Passport Photo at Home
Yes, it can absolutely be done at home. In fact, many parents prefer it. Less stress. More control. Zero rushing.
1. Pick the Right Time of Day
Timing is everything. Choose a moment when the baby is:
- Recently fed
- Well-rested
- Calm and alert
Trying during a hungry meltdown? Not worth it. Mid-morning often works well. Babies tend to be more settled then.
2. Create a Proper Background
This part matters more than people think. Lay a plain white sheet on a flat surface - like a mattress or the floor. Smooth out wrinkles. Shadows count as distractions, so make it as even as possible. Avoid textured blankets. Avoid patterned fabrics. Clean and simple wins. Some parents tape white poster board to a wall and hold the baby upright. That can work too - as long as no hands appear in the frame.
3. Position the Baby Correctly
For a one-month-old, lying down is usually easiest. Place the baby flat on their back on the white sheet. Position the camera directly above their face. Not at an angle. Straight down. Think of it like photographing a tiny starfish. Make sure:
- The head is centered
- The chin is not tucked too tightly
- The baby is looking upward
If the baby keeps turning their head, gently wait. Patience works better than forcing it.
4. Use Natural Light - But Carefully
Lighting can make or break the shot. Place the setup near a window with soft daylight. Avoid direct sunlight hitting the baby’s face. Harsh light creates shadows under the nose and chin. Cloudy days? Honestly, they’re perfect. The light is diffused and flattering. Avoid flash. It can create red-eye and uneven skin tones.
5. Capture Multiple Shots
One photo won’t cut it. Take dozens. Blinking happens fast. Expressions change in seconds. The more options available, the better the final selection will be. Use burst mode if possible. Smartphones today are more than capable of producing high-resolution passport images.
What If the Baby Won’t Open Their Eyes?
This is the question everyone eventually asks. At one month old, babies sleep. A lot. Here are gentle tricks that sometimes help:
- Photograph right after a diaper change
- Make soft clicking sounds near the camera
- Wait for natural alert moments instead of forcing wakefulness
Never use bright lights to startle them awake. It’s unnecessary and uncomfortable. Sometimes it takes a few attempts across different days. That’s normal.
Common Mistakes to Avoid
This is where many applications get rejected. Keep an eye out for these issues:
Shadows on the Background
Even faint shadows can cause problems. Adjust lighting or reposition slightly if needed.
Visible Parental Hands
If someone supports the baby, their hands must stay completely out of frame. No fingers near the head. None.
Busy Clothing
Dress the baby in something simple. Solid colors. Avoid white outfits that blend into the background.
Incorrect Cropping
The head size must meet official guidelines. Too zoomed in? Rejected. Too small? Also rejected. This is where many parents feel unsure.
Editing and Formatting the Photo Properly
Taking the image is only half the process. The photo must also:
- Be correctly sized
- Have proper head positioning
- Meet brightness and contrast standards
- Follow official passport dimensions
Instead of guessing, many families use online tools designed specifically for this purpose. One example is BabyPassportMaker.com, which helps adjust baby passport photos to meet official standards. It handles cropping, sizing, and formatting automatically. That removes the anxiety of wondering, "Will this get rejected?" And peace of mind is worth a lot when dealing with travel documents.
Should Parents Use a Professional Studio?
It depends. Professional photographers have experience. They know the rules. They control lighting perfectly. But studios can be:
- Expensive
- Time-consuming
- Stressful with a newborn
Some babies cooperate beautifully under studio lights. Others cry the entire time. Home photos offer flexibility. If the baby gets fussy, there’s no pressure. Try again later. If you ask most seasoned parents, convenience usually wins.
How Long Does the Process Take?
That depends entirely on the baby. Some families capture a perfect shot in 15 minutes. Others need a few short sessions across two or three days. The key is not rushing it. Treat it like fishing. Quiet. Patient. Waiting for the right moment. Eventually, the baby looks up. Eyes open. Calm expression. Click. Done.
Quick Checklist Before Submitting
Before printing or uploading the image, review this:
- Is the background plain and shadow-free?
- Are the baby’s eyes open?
- Is the head centered and facing forward?
- Are there no hands or objects visible?
- Is the size exactly as required?
Double-checking now prevents delays later. And nobody wants a passport application bouncing back because of a tiny technical issue.
Final Thoughts on Taking a Passport Photo for a 1 Month Old
Photographing a newborn for official documents isn’t glamorous. It’s not artistic. It won’t win awards. But it doesn’t have to be overwhelming either. With soft lighting, a simple white background, good timing, and a bit of patience, parents can successfully take a baby passport photo at home. The secret isn’t fancy equipment. It’s calm persistence. And maybe a few extra snapshots, just in case. Once it’s done, that tiny photo becomes something meaningful - the first step toward travel, family visits, new memories waiting somewhere out there. Not bad for a picture taken on a bedsheet.