How to take baby passport photo for 3 month old
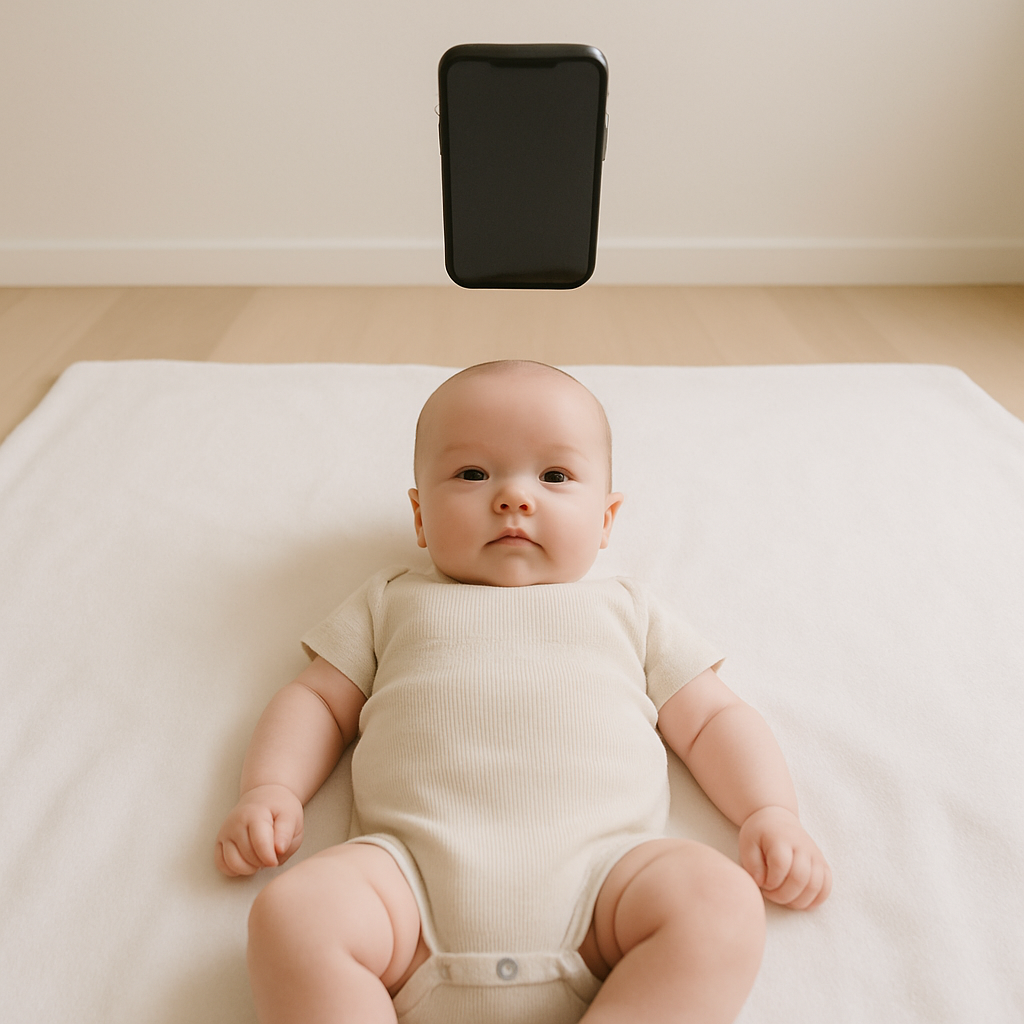
Taking a passport photo of a 3 month old baby sounds simple. It isn’t. Anyone who has ever tried to photograph an infant knows the truth - babies operate on their own schedule. They wiggle. They blink. They scrunch their tiny faces into expressions that look adorable in family albums but absolutely won’t pass passport regulations. Still, it can be done. And it can be done at home. This guide breaks down exactly how to take a baby passport photo for a 3 month old, step by step, without losing patience or sanity. ## Understanding Baby Passport Photo Requirements Before picking up a camera, it helps to understand what passport agencies actually want. At a glance, baby passport photo requirements usually include: - A plain white or off-white background - No shadows on the baby’s face or background - Eyes open and visible - Neutral expression - Mouth closed - No hats, headbands, or pacifiers - Full face visible and centered Sounds straightforward, right? Here’s the catch - a 3 month old doesn’t care about government guidelines. The trick is setting up the environment so the baby naturally falls into compliance without force. Because forcing anything with an infant? That’s a losing game. ## Setting Up the Perfect Background at Home A professional studio isn’t required. In fact, many parents successfully take passport photos right in their living room. The easiest method is simple: ### Option 1: Lay the Baby Down Place a plain white sheet or blanket on a firm, flat surface like: - The floor - A mattress - A large table (with supervision, obviously) Smooth out wrinkles. Creases can cast shadows and create unwanted texture. Lay the baby on their back and position yourself directly above them. The camera should be parallel to their face - not angled. If the lens tilts, the image may get rejected. ### Option 2: Use a Car Seat Some parents swear by this method. Cover the car seat with a white blanket and ensure no straps are visible in the frame. The seat supports the baby’s head naturally, which can make things easier. Just make sure: - The baby’s head is upright - No part of the seat shows - The background remains fully white If you ask many parents, they’ll admit this approach saves time. ## Lighting - The Make or Break Factor Lighting can turn a perfect pose into a rejected photo in seconds. Natural light works best. Position the baby near a window where soft daylight fills the space. Avoid direct sunlight because it creates harsh shadows and uneven tones. Artificial lighting can work too, but it needs balance. Shadows under the chin or behind the ears often cause problems. Here’s a quick checklist: - No flash glare on skin - No shadows on background - Even lighting across the face - Clear, natural skin tones Think of lighting like a filter you cannot edit later. If it’s wrong in the beginning, fixing it afterward becomes complicated. ## Getting a 3 Month Old to Keep Eyes Open Now comes the real challenge. At three months old, babies are just beginning to develop better head control and longer alert periods. Timing matters. The best moment to take the photo? Right after a nap. After feeding. When the baby is calm but awake. Not during: - A growth spurt - A fussy hour - Bedtime To encourage open eyes, try: - Standing behind the camera and making soft sounds - Using a quiet rattle - Calling the baby’s name gently But keep it subtle. Overstimulating them can lead to wide-eyed expressions that look startled instead of neutral. Passport rules don’t require a smile. In fact, a calm, relaxed expression works best. ## Head Position and Facial Expression This part gets overlooked. The baby’s head must be straight and centered. Not tilted. Not leaning. Not slightly turned. It sounds picky. It is. A crooked head can lead to rejection, and that means retaking the photo. Ensure: - Both ears are visible - Eyes are level - Mouth is closed - No visible hands in frame Sometimes a baby will raise their arms or grab the blanket. Patience helps here. Wait for the moment when their hands naturally drop. It might take ten shots. Maybe twenty. That’s normal. ## Camera Tips for Crisp, Compliant Photos A smartphone camera is usually more than enough. Modern phones capture high-resolution images that meet passport standards. To improve the result: 1. Use the rear camera, not the selfie lens. 2. Turn off beauty filters or portrait modes. 3. Hold the camera steady - directly above the baby. 4. Take multiple photos in burst mode. 5. Check sharpness before moving on. Blurry images are automatically rejected. Even slightly out-of-focus shots won’t pass. Imagine trying to print a smudged document - same idea. ## Common Mistakes That Lead to Rejection This is where many parents stumble. Here are frequent errors: - Visible shadows behind the head - Pacifier in mouth - Parent’s hands visible in frame - Patterned blanket background - Baby looking off to the side - Overexposed lighting washing out features One small oversight can delay a passport application by weeks. Frustrating? Absolutely. Avoiding these mistakes from the start saves time and stress. ## Cropping and Sizing the Photo Correctly Passport photos must meet precise size requirements depending on the country. For example, U.S. baby passport photo requirements include: - 2 x 2 inches in size - Head size between 1 inch and 1 3/8 inches from chin to crown - Centered alignment Getting those proportions right manually can feel like measuring flour without a measuring cup. Close isn’t good enough. This is where tools become useful. Services like BabyPassportMaker.com help parents adjust, crop, and format baby passport photos to meet official requirements. Instead of guessing dimensions, the platform aligns everything automatically. For parents who want reassurance before submitting an application, that kind of support can make a big difference. ## Should Parents Use a Professional Studio? Some families prefer going to a pharmacy or photo studio. Pros: - Controlled lighting - Staff familiar with requirements - Immediate printed copies Cons: - Scheduling appointments - Traveling with a 3 month old - Higher cost - Limited patience for multiple retakes If the baby is particularly fussy, home sessions often work better. At home, there’s no pressure. No waiting customers. No ticking clock. ## Step-by-Step Quick Checklist For parents who want a fast reference, here it is: 1. Choose a plain white background. 2. Use soft, natural lighting. 3. Lay baby flat or support head safely. 4. Ensure eyes are open and visible. 5. Keep expression neutral and mouth closed. 6. Remove accessories and visible hands. 7. Take multiple high-resolution photos. 8. Crop to official passport size. Simple steps. Careful execution. ## Final Thoughts on Taking a Baby Passport Photo Photographing a 3 month old for a passport is equal parts preparation and patience. There will be moments when the baby turns away. Or yawns. Or decides now is the perfect time to protest. That’s okay. The key is staying calm and creating the right setup so the photo almost takes itself. With proper lighting, a clean background, correct sizing, and maybe a little help from tools like BabyPassportMaker.com, parents can confidently submit a compliant passport photo without leaving home. And once it’s approved? That tiny photo becomes the first step toward big adventures. Not bad for a few minutes on a white blanket.