How to take baby passport photo with neutral face
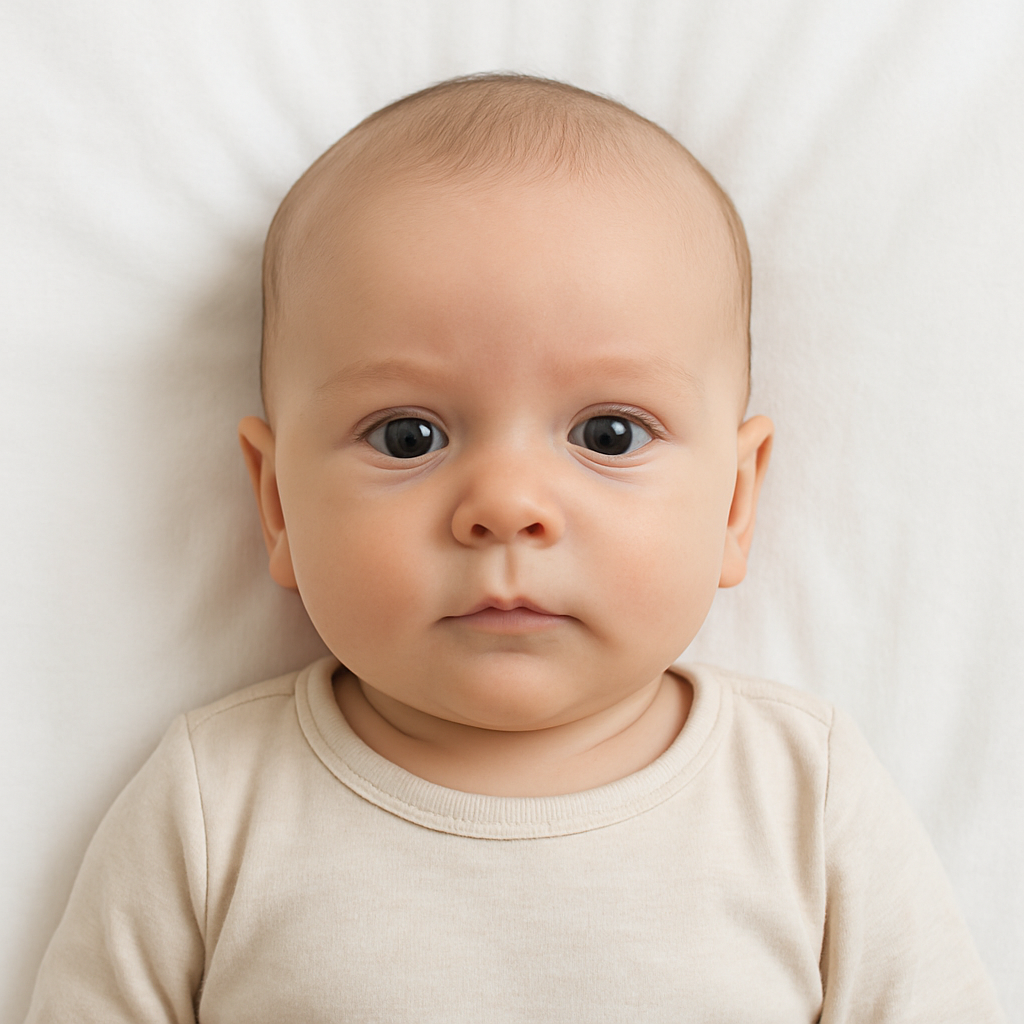
Getting a baby to sit still is already a small miracle. Getting that same baby to hold a neutral face for a passport photo? That can feel like negotiating world peace in a onesie. Still, it’s absolutely doable. Parents everywhere manage to capture that perfect, government-approved baby passport photo without tears, shadows, or surprise giggles. It just takes patience, a few smart tricks, and knowing what the passport office actually wants. Let’s break it down in a way that feels realistic - because babies are anything but predictable.
Why a Neutral Face Matters for a Baby Passport Photo
Passport agencies are strict. Not picky. Strict. A baby passport photo must show a neutral expression, eyes open, mouth closed, and no exaggerated facial movements. No smiles. No frowns. No tongue sticking out mid-giggle. Why? Because biometric systems need a clear, unobstructed view of facial features. Think of it like facial recognition software trying to “memorize” your baby’s face. If the expression changes too much, it becomes harder to match later. Sounds intense for someone who just learned how to roll over, right? But don’t worry - the standard is firm, yet achievable.
What “Neutral Face” Actually Means for Babies
Here’s a hot take: neutral doesn’t mean emotionless robot baby. For infants, authorities understand limitations. A neutral face generally means:
- Eyes open and clearly visible
- Mouth closed (or at least not wide open)
- No visible crying or laughing
- No exaggerated expressions
A slight natural expression is usually fine. The key is avoiding obvious smiles or dramatic reactions. In other words, calm and relaxed wins the day.
Step-by-Step Guide to Taking a Baby Passport Photo at Home
Yes, you can absolutely take a baby passport photo at home. Many parents do. And with the right setup, the result can look just as professional as a studio shot.
1. Choose the Right Time of Day
Timing is everything. A tired baby won’t cooperate. A hungry baby definitely won’t cooperate. The sweet spot? After a nap and feeding. That short window when the baby is calm, alert, and curious about the world - that’s your moment. Move quickly, but gently.
2. Find the Perfect Lighting
Lighting can make or break the shot. Natural daylight works best. Position the baby facing a window, but avoid direct sunlight. Harsh light creates shadows under the chin and around the eyes. Passport officials reject photos for that. Think soft, even lighting. Like a cloudy day glow. Avoid:
- Flash photography
- Overhead lights causing shadows
- Yellow indoor bulbs
The goal is balanced lighting across the entire face.
3. Use a Plain White Background
The background must be plain white or off-white. No patterns. No textures. No cute nursery wallpaper. A simple trick? Lay a white sheet on the floor and place the baby on their back. Smooth out wrinkles. Make sure there are no visible creases behind the head. Another option is draping a white blanket over a car seat. Just ensure it looks flat and uniform. Clean background. Zero distractions.
4. Position the Baby Correctly
The baby’s head must be centered and facing straight at the camera. No tilting. No side angles. If lying down, stand directly above and shoot straight down. Keep the camera parallel to the baby’s face. Make sure:
- The entire head is visible
- No hands are covering the face
- No pacifiers or toys are present
- No parent hands are visible in frame
Sounds simple, right? In reality, this step may take several attempts. That’s normal.
5. Capture That Neutral Expression
Now comes the tricky part. Babies react to everything - sounds, faces, ceiling fans. The trick is to keep stimulation minimal. Instead of making silly noises to get attention, try this:
- Get the camera ready before placing the baby down.
- Call their name softly.
- Make gentle eye contact.
- Snap photos continuously.
Take multiple shots in quick succession. One of them will likely catch that calm, neutral look. Patience beats perfectionism here.
Common Mistakes That Lead to Rejection
Nobody wants to redo passport paperwork because of a photo error. Yet it happens all the time. Here are the biggest issues:
Shadows on the Face
Even subtle shadows can trigger rejection. Check under the chin and around the ears.
Visible Support Hands
If someone is holding the baby, their hands cannot appear in the photo. Not even a fingertip.
Open Mouth or Crying
A wide-open laugh may look adorable, but it won’t pass.
Incorrect Photo Size
Different countries have different dimensions. Submitting the wrong size guarantees delays.
Why Many Parents Use Online Passport Photo Services
Here’s where things get interesting. Even if the photo looks perfect, formatting mistakes can still cause rejection. Cropping, background tone, head positioning ratios - these technical details matter. That’s why many parents turn to professional online tools like BabyPassportMaker.com. It simplifies the process by:
- Automatically adjusting photo size
- Ensuring correct head positioning
- Verifying background compliance
- Reducing rejection risk
If you ask many seasoned parents, they’ll say it saves time and stress. And honestly, fewer errands with a baby? That’s a win.
Tips for Different Baby Ages
Not all babies behave the same way. A two-week-old is very different from a nine-month-old.
Newborns
Newborns can be photographed lying down. Their limited movement actually helps. The challenge is keeping eyes open. Gently stimulating them before the photo - without causing fussiness - can help.
3 to 6 Months
At this stage, babies start reacting more. They smile. They wiggle. Timing becomes crucial. Quick bursts of photos work best.
6 to 12 Months
Now mobility increases. Sitting with support may work, but again - hands must stay hidden. Distraction-free environments are essential here.
Camera Settings That Make a Difference
You don’t need a professional DSLR. Modern smartphones are more than capable. Just follow these simple guidelines:
- Use high resolution
- Turn off beauty filters
- Disable portrait mode blur
- Keep the camera steady
Filters and enhancements might look flattering, but they alter facial details. Passport agencies want authenticity, not Instagram polish.
Final Checklist Before Submitting
Before sending the photo off, run through this quick checklist:
- Is the background plain white?
- Are both eyes clearly open?
- Is the mouth closed?
- Is the face centered and straight?
- Are there zero shadows?
- Is the image properly cropped to required dimensions?
If every answer is yes, you’re in good shape.
The Reality of Baby Passport Photos
Let’s be honest for a second. Taking a baby passport photo with a neutral face is part technical process, part patience test. It’s a little like trying to photograph a cloud - constantly shifting, rarely predictable, occasionally perfect. But it doesn’t require professional equipment or hours of frustration. With good lighting, a clean background, and the right timing, parents can capture a compliant baby passport photo at home. And if formatting feels overwhelming, services like BabyPassportMaker.com exist precisely to smooth out those final details. Travel plans are exciting. Paperwork? Not so much. Still, once that tiny passport arrives, photo and all, it feels like a small milestone. A first step toward adventures ahead. And it all started with one calm, neutral expression.