Infant Passport Photo for Australian Citizenship
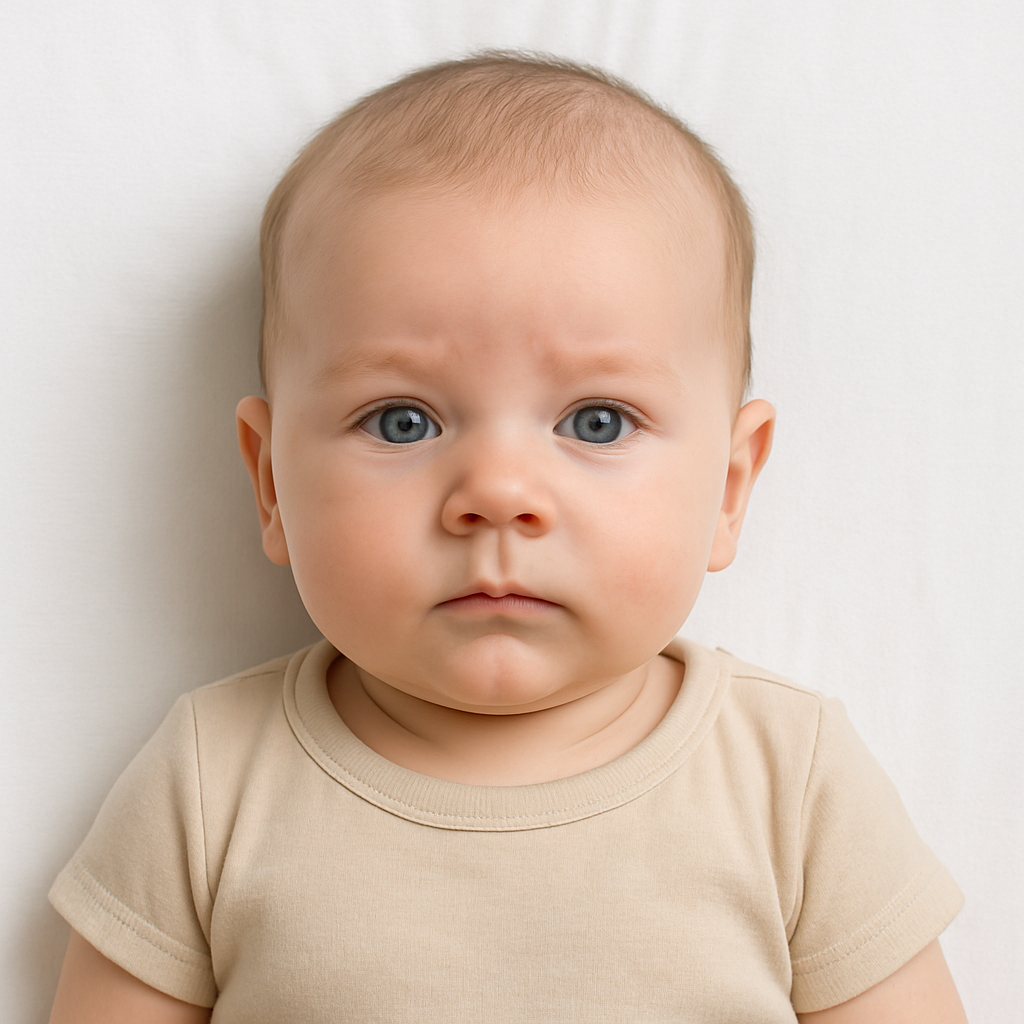
Applying for Australian citizenship for a baby sounds simple enough. Fill out forms. Submit documents. Add a photo. Done. But then comes the passport photo. And suddenly, what felt like a tidy checklist turns into a full-blown mission. The baby won’t sit still. The lighting looks wrong. One eye is half-closed. The background isn’t quite white. Parents quickly discover that an infant passport photo for Australian citizenship isn’t just a cute snapshot - it’s a tightly regulated requirement. If you ask most parents, the photo is the most unexpectedly stressful part of the entire process. Let’s break it down properly.
Why Infant Passport Photos Are So Strict
Australian citizenship applications demand precision. The Department of Home Affairs doesn’t treat baby photos as "close enough." The standards exist for one reason - identity verification. Even newborns need clear biometric images. That means:
- Neutral facial expression
- Eyes open and visible (where possible)
- No shadows on the face
- Plain white background
- No other people or objects in frame
Sounds easy, right? Now imagine trying to explain "neutral expression" to a three-month-old. Babies squirm. They blink. They yawn mid-shot. Some stare intensely into space like tiny philosophers. Others cry the moment they’re laid down. The camera, however, doesn’t care.
Official Requirements for an Australian Infant Passport Photo
Before anyone grabs a smartphone and hopes for the best, it helps to know exactly what’s required.
Photo Specifications
For Australian citizenship and passport purposes, the infant photo must:
- Be 35mm to 40mm wide and 45mm to 50mm high
- Show full head and top of shoulders
- Have a plain white or light grey background
- Be high resolution, no blur or pixelation
- Be printed on quality photo paper (if submitting physical copy)
Digital submissions also follow strict size and clarity rules. Even minor shadows behind the head can lead to rejection. And yes - that happens more often than most expect.
The Common Mistakes Parents Make
There’s a pattern. After reviewing hundreds of rejected infant passport photos, certain errors show up again and again. Here are the big ones:
- Parent’s hands visible in the frame
- Baby lying on patterned blankets
- Pacifier still in mouth
- Harsh overhead lighting causing shadows
- Red-eye effect
- Head tilted too far to one side
One father once carefully positioned his daughter on a white pillow, convinced he’d nailed it. Everything looked perfect - until he zoomed in and noticed the faint floral stitching in the fabric. Application delayed. Tiny detail. Big consequence. That’s how unforgiving passport photo rules can be.
Can Babies Smile in Passport Photos?
Here’s a hot take - a slight, natural baby expression is usually acceptable. But a wide, gummy grin? Not ideal. The goal is a neutral look. Relaxed mouth. Eyes open. No exaggerated emotion. Of course, telling a six-month-old not to smile is like asking the ocean not to wave. It might cooperate briefly. Then it changes its mind. Timing matters. Parents often find success right after a nap or feeding - when the baby is calm but alert.
DIY vs Professional Services - What Actually Works?
Some families attempt the DIY route. Others head straight to a professional photographer. Both options can work. But there’s a third route that many now prefer - specialised online services designed specifically for passport compliance. One such service is BabyPassportMaker.com. Instead of wrestling with editing tools or guessing dimensions, parents upload a photo and let experts adjust lighting, crop size, and ensure background compliance. It removes the technical headache. Honestly, that convenience alone is worth considering. Because here’s the thing - retaking photos multiple times isn’t just annoying. It delays the citizenship process. And no parent wants paperwork dragging on longer than necessary.
How to Take a Compliant Infant Passport Photo at Home
For those determined to try at home, there are ways to improve the odds.
Step 1 - Choose the Right Setup
Lay the baby on a plain white sheet placed flat on the floor. Smooth out every crease. Even slight wrinkles can create unwanted shadows. Natural daylight works best. Position near a window but avoid direct sunlight.
Step 2 - Position Carefully
Place the camera directly above the baby’s face. Keep it parallel. No angled shots. Make sure:
- Both ears are visible (if possible)
- Eyes are open
- No toys are in sight
- No hands are supporting the head within the frame
Some parents roll up towels under the sheet to gently stabilise the head. Clever. Invisible. Effective.
Step 3 - Take Multiple Shots
Never rely on one image. Take ten. Twenty. Maybe more. Digital storage is cheap. Application delays are not.
Lighting - The Silent Dealbreaker
Lighting can make or break an infant passport photo. Too dark? Rejected. Too bright? Facial details washed out. Overhead light casting shadows under the chin? Also rejected. The ideal setup uses soft, even light from both sides. Think of it like photographing a delicate sculpture. The face must appear clear, balanced, and shadow-free. Even a faint grey gradient behind the head can cause issues. It sounds extreme. Because it is.
What About Newborns Who Can’t Hold Their Head Up?
Good question. For very young babies, laying them flat is completely acceptable. The key is ensuring the head isn’t tilted excessively and that no adult is visible. Some parents attempt to hold the infant upright while covering themselves with a white sheet. Risky. A stray finger or shadow can invalidate the image. Flat positioning tends to be safer.
Why Rejections Happen - And How to Avoid Them
Most photo rejections come down to three things:
- Improper background
- Incorrect size or cropping
- Visible support from another person
Avoiding these pitfalls dramatically increases approval chances. That’s why specialised services continue to grow in popularity. They double-check dimensions, adjust contrast, and ensure compliance before submission. Peace of mind has value.
Processing Time and Why the Photo Matters
Citizenship applications already involve waiting. Weeks. Sometimes months. Submitting an incorrect infant passport photo resets the clock. Authorities may request a new image, which pauses progress. Imagine preparing documents, paying fees, waiting patiently - only to receive a notice stating the photo doesn’t meet standards. Frustrating doesn’t even begin to cover it. Getting the photo right the first time prevents unnecessary setbacks.
Final Thoughts on Infant Passport Photos for Australian Citizenship
An infant passport photo for Australian citizenship might seem like a tiny task in a much larger process. Just one image. Just a few centimetres of printed paper. But that small rectangle carries weight. It confirms identity. It supports legal recognition. It becomes part of official records that may follow the child for years. Parents often underestimate the precision involved - until they attempt it themselves. The smartest approach? Understand the requirements fully. Control lighting. Keep the background perfectly plain. Take multiple shots. And if there’s doubt, use a service built specifically for this purpose. Because when it comes to citizenship applications, "almost right" isn’t right enough. And no one wants to redo baby photos twice. Or three times. Once is plenty.