What to Wear Passport Photos: Guidelines and Examples
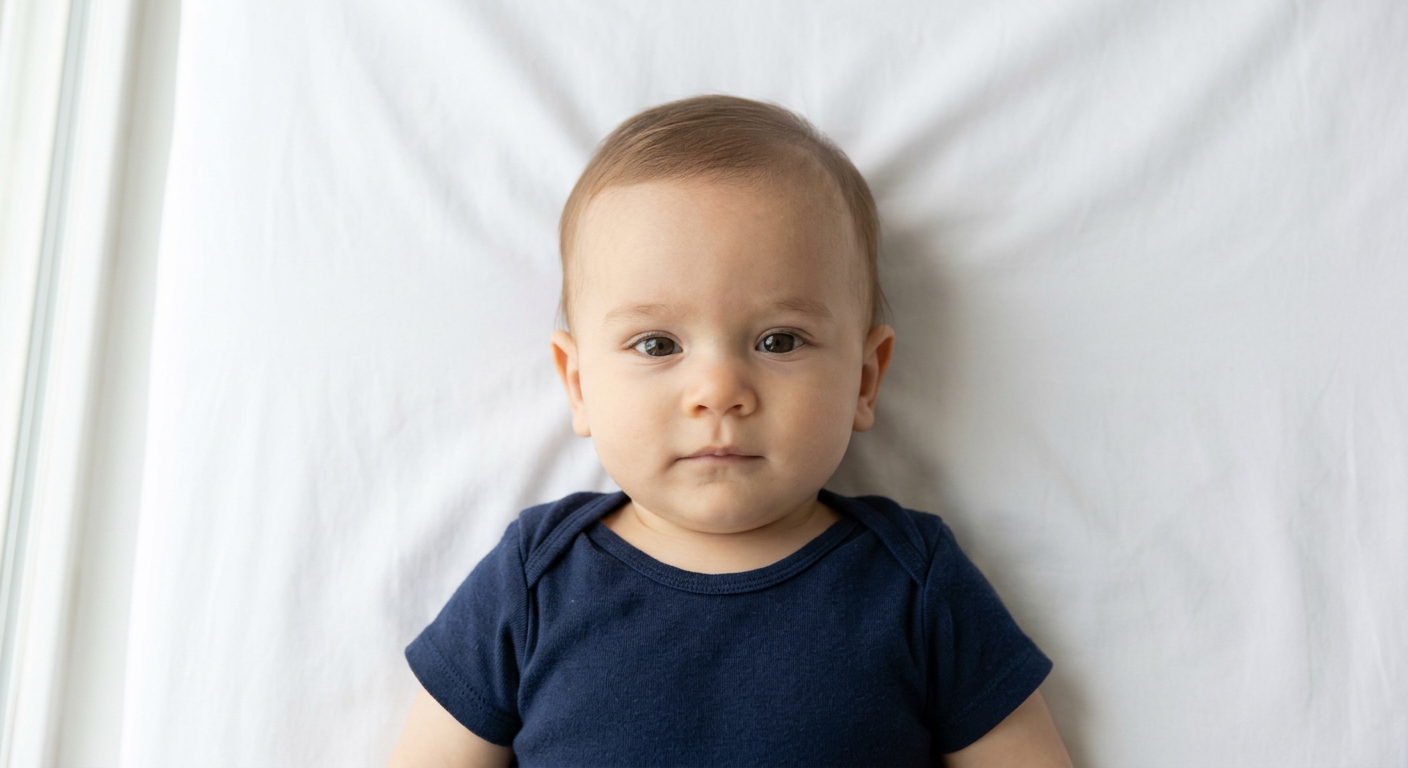
A parent opens a passport application portal, uploads a sharply focused image of their infant, and immediately receives a biometric rejection warning. The lighting was perfectly even and the baby was looking straight at the camera. The failure point was the clothing. The infant was wearing a white onesie against a white bedsheet, causing their shoulders to vanish entirely into the background. When deciding what to wear passport photos demand more than simply looking presentable. Clothing dictates the contrast, defines the visible neckline, and ultimately determines whether an automated biometric scanner can recognize the boundaries of a human face and body.
Quick Summary
Passport photo clothing must provide high contrast against a plain white or light grey background while keeping the neck and jawline completely visible. Government biometric software relies on clear boundaries between your attire, your skin, and the background to validate the image.
- Wear dark, solid colors to ensure the cropping algorithm can locate your shoulders.
- Choose a crew neck or standard collar to avoid appearing unclothed after the tight passport crop.
- Remove all headbands, large bows, and glasses, as these disrupt facial landmarks.
- Pull hair back to expose the eyebrows, ears, and the entire jawline.
- Lay infants on a flat white sheet wearing dark clothing to eliminate fabric bunching and shadows.
Table of Contents
- 1. Select High-Contrast, Solid Colors
- 2. Choose the Right Neckline
- 3. Remove Disruptive Accessories and Eyewear
- 4. Style Hair to Expose Facial Landmarks
- 5. Control the Lighting and the Pose
- Common Pitfalls & Troubleshooting
- FAQ
- Recommended Reads
1. Select High-Contrast, Solid Colors
Biometric scanning software and AI background removal tools rely entirely on edge detection. These systems look for the sharp pixel contrast between a person's clothing and the required plain white or light grey background. When you wear white, cream, or light pastel colors, that boundary disappears. The software cannot determine where the shoulder ends and the background begins, resulting in a rejected "floating head" image.
The mechanics of this failure are straightforward. Government agencies require a clear silhouette to confirm the physical presence and posture of the applicant. If the shoulders blend into the wall, the image fails the composition check. Furthermore, patterned clothing containing heavy stripes or logos can interfere with the camera's focus and create optical distortions during the official printing process.
The most common mistake applicants make is dressing up in a crisp white dress shirt or putting a newborn in a traditional white christening outfit. While these look excellent in standard portraiture, they actively sabotage document photos.
To prevent this, wear dark, solid colors like navy blue, charcoal, black, or deep green. These shades create an undeniable boundary against a light background. For babies, swapping a light outfit for a dark blue or red onesie instantly solves background separation issues. When reviewing a passport photo example side-by-side, the difference in edge clarity between a white shirt and a dark shirt is immediate and obvious to both automated scanners and human reviewers.
2. Choose the Right Neckline
The proportions of a passport picture are heavily regulated. Most government standards require the head to be tightly framed, specifically measuring 25 to 35 mm from the chin to the crown of the head. Because the face must dominate the frame, the final crop cuts off just below the collarbone.
This cropping ratio creates specific problems for certain clothing choices. If an adult wears a deep V-neck, a wide scoop neck, or a strapless top, the fabric falls below the official crop line. On the printed document, the applicant appears completely unclothed. Conversely, wearing a high, thick turtleneck or a winter scarf obscures the bottom of the chin and the jawline. The biometric software must map the exact shape of the jaw to verify identity; if a collar hides that boundary, the application is denied.
Practical rule: Choose a crew neck, a standard button-down collar, or a modest scoop neck that rests visibly below the collarbone but above the sternum.
The frequent error here is failing to anticipate the final crop. People frame the photo too wide on their smartphones, assuming their entire torso will be visible. When the image is processed and cropped to official specifications, a previously acceptable outfit suddenly becomes a rejection liability. Always evaluate your clothing choice based on how it looks from the upper chest upward.
3. Remove Disruptive Accessories and Eyewear
Government rules regarding accessories are unyielding because accessories obscure the biometric landmarks used by facial recognition systems. The distance between the pupils, the width of the nose, and the shape of the eye sockets are critical measurements.
Glasses are universally problematic. Even glasses with anti-reflective coatings will catch microscopic glares from a camera flash or a window, obscuring the pupil. Furthermore, thick frames cast shadows on the cheekbones or physically block the outer edge of the eye. Almost all modern passport guidelines explicitly forbid eyeglasses unless accompanied by a signed medical exemption for a temporary condition.
For infants and toddlers, parents frequently make the mistake of leaving on decorative accessories. A large bow, a thick headband, or a hat alters the visible outline of the head. The software needs to locate the exact "crown" (the physical top of the skull) to calculate the 25 to 35 mm facial height requirement. A bow extending an inch above the actual head throws off this calculation entirely.
Pacifiers are another strict violation. The mouth must be closed and fully visible. If a baby is wearing a pacifier, the lips and jawline are hidden, and the image is useless for identification. Before taking the photo, strip away all non-essential items: remove glasses, pull off headbands, take out large dangling earrings, and ensure the child's mouth is clear.
4. Style Hair to Expose Facial Landmarks
Hair styling plays a crucial role in the success of an official document image. The software mapping a face requires clear visibility of the forehead, the edges of the cheeks, and the jawline.
A standard failure mode occurs when long bangs are swept across the forehead, covering the eyebrows. Eyebrows are primary anchor points for facial recognition algorithms. If hair obscures them, the scan fails. Similarly, hair that falls forward over the shoulders and cheeks can cast deep shadows on the face. Shadows are interpreted by biometric software as physical contours. A shadow cast by a lock of hair might be read as a facial scar or an asymmetrical cheekbone, leading to a mismatched biometric profile.
The most practical approach is to tuck all hair securely behind the ears. While not every country strictly mandates visible ears, exposing them guarantees that the sides of the face and the cheekbones remain entirely visible and shadow-free. For infants with unruly hair, use a damp cloth to gently smooth it flat against the scalp. Avoid using highly reflective gels or sprays, as these can create artificial highlights that confuse the camera sensor.
5. Control the Lighting and the Pose
Understanding how to take the best passport photo means understanding how clothing interacts with lighting and posture. You can wear the perfect dark, crew-neck shirt, but if you sit beneath a harsh overhead light, the collar will cast a heavy shadow directly onto your neck and chin.
Posture directly affects how clothing sits on the body. Slouching causes collars to bunch up around the jawline, mimicking the negative effects of a turtleneck. Sit up straight and pull your shoulders down and back. This stretches the fabric flat across the chest and ensures the neck is fully elongated and visible.
For infants, the mechanics are different. Babies cannot sit up straight on their own. The standard method is to lay the infant flat on their back on a plain white sheet. However, when a baby lies down, their clothing tends to ride up around their ears, obscuring the jawline. The fix is to have an adult reach just outside the camera frame and gently pull the bottom of the baby's shirt downward, flattening the collar against the chest. Position the baby so that natural window light hits their face directly, eliminating any shadows the clothing might cast on the sheet beneath them. If you want to see exactly how this looks when done correctly, reading a dedicated US Baby Passport Photo Guide provides specific insights into formatting infant posture for strict government standards.
Common Pitfalls & Troubleshooting
When a document image fails, the rejection notice is often vague, citing a "composition error" or "biometric failure." The following are the most common clothing and grooming failures, how to spot them, and how to fix them.
The Floating Head * Symptom: The applicant's shoulders vanish into the background, leaving only a face and neck visible in the final crop. * Cause: Wearing a white or light-colored shirt against a white background. Edge detection algorithms cannot separate the subject from the wall. * Fix: Change into a dark, solid-colored shirt (navy, black, or dark grey) to force a high-contrast boundary.
The Invisible Chin * Symptom: The rejection notice states the jawline is not visible or the head height cannot be measured. * Cause: A bulky collar, a hoodie pulled up near the neck, or a thick winter scarf is obscuring the bottom edge of the chin. * Fix: Swap to a flat crew neck or a standard t-shirt. Ensure the fabric sits entirely below the collarbone.
The Unclothed Illusion * Symptom: In the final cropped preview, the applicant appears to be wearing no shirt at all. * Cause: Wearing a deep V-neck, a wide scoop neck, or a strapless top. Because the camera crops tightly around the neck and face, the fabric of a low-cut top is eliminated entirely. * Fix: Wear a shirt with a higher neckline that enters the frame close to the base of the neck.
The Crown Obscuration (Most common for infants) * Symptom: The software cannot automatically crop the image, or the application is rejected for improper head sizing. * Cause: A baby is wearing a thick headband or a large decorative bow. The software measures from the chin to the top of the accessory, not the top of the skull, resulting in a head that appears too small in the final frame. * Fix: Remove all headwear, bows, and clips. Ensure the actual top of the baby's head is clearly visible.
FAQ
Can I wear a uniform in my photo? No. The vast majority of governments strictly prohibit the use of military, law enforcement, or flight crew uniforms in civilian travel documents. This rule prevents misidentification at border crossings. You must wear plain, everyday clothing.
Are religious head coverings allowed? Yes, religious head coverings like hijabs or yarmulkes are permitted if worn daily for religious purposes. However, they must not cast any shadows on the face, and the entire face from the bottom of the chin to the top of the forehead must be visible. The edges of the cheeks cannot be obscured.
Can infants wear a pacifier during the photo? No. A pacifier covers the mouth and alters the visible shape of the jawline and cheeks. The infant's mouth must be clear, and ideally closed, though some jurisdictions offer slight leniency for newborns regarding a partially open mouth.
Can I wear makeup? Yes, standard everyday makeup is acceptable. However, you must avoid heavy contouring. Contouring intentionally alters the appearance of your cheekbones, nose width, and jawline - the exact metrics biometric software uses to identify you. Keep makeup natural and avoid highly reflective glosses or highlighters that cause glare.
Do my ears have to be completely visible? Rules vary by jurisdiction. While some countries do not explicitly demand visible ears, tucking your hair behind your ears is the safest approach. It guarantees that the edges of your face are unobstructed and prevents your hair from casting shadows on your cheeks.