How to Navigate the 2026 sg passport photo requirements
Singapore's Immigration & Checkpoints Authority (ICA) processes thousands of digital applications daily, yet a significant portion are automatically rejected by the system's compliance algorithms before a human officer ever reviews them. The primary reason is not the applicant's eligibility, but a failure to meet the precise digital formatting rules of the sg passport photo requirements. A shadow cast across the neck, a subtle gradient in the background, or a digital file compressed incorrectly will trigger an immediate halt to the application process. Government portals rely on facial recognition software to map biometric data points, and any photographic element that obscures those points results in a hard failure.
Quick Summary
The Singapore ICA mandates strict biometric parameters for all passport and visa applications, relying heavily on automated validation before human review. A compliant application demands a digital image free of shadows, compressed precisely, and shot against a pure white background without digital alteration.
- Digital files must measure exactly 400 by 514 pixels.
- Backgrounds must be pure white, not gray or off-white.
- The subject's head must measure between 25 mm and 35 mm from chin to crown.
- Files must be under 2MB in JPEG format, without compression artifacts.
- Glasses and hair accessories should be removed to ensure clear biometric mapping.
Table of Contents
- Why the ICA validation algorithm rejects valid applicants
- 1. Control color temperature to eliminate biometric failure
- 2. Construct a seamless white background free of shadows
- 3. Frame the subject using strict dimensional constraints
- 4. Strip away biometric obstructions and normalize expressions
- 5. Format the digital file to survive server compression
- Common Pitfalls & Troubleshooting
- FAQ
- Recommended Reads
Why the ICA validation algorithm rejects valid applicants
The Singapore government uses an automated biometric validation matrix to review every uploaded image before assigning it to an immigration officer. This software maps specific nodal points on the human face: the distance between the pupils, the width of the nose, and the exact curvature of the jawline. When an applicant attempts to meet strict government passport photo requirements at home, they often focus entirely on the subject's expression while ignoring the environmental data the camera captures.
If the software cannot accurately distinguish the edge of the cheekbone from a shadow on the wall, it halts the application. The system operates on absolute parameters, meaning there is no human judgment involved in the initial screening. An image that is perfectly sharp but features a background that reads as slightly gray instead of pure white will fail just as quickly as an image that is completely out of focus. Understanding these mechanical thresholds is the only way to guarantee a successful upload on the first attempt.
1. Control color temperature to eliminate biometric failure
The most frequent cause of automated rejection is mixed lighting. Cameras record color temperature differently than the human eye. When you light a room with a standard tungsten overhead bulb while daylight spills in through a window, the sensor records two conflicting color temperatures. This casts a subtle blue hue on one side of the face and a harsh orange tint on the other.
The ICA's software reads this sudden shift in skin tone as digital alteration or an obstruction, triggering a rejection. Learning how to get the perfect passport size photo means eliminating ambient light conflicts entirely. You must rely on a single, even light source. Stand facing a large window providing indirect sunlight, and turn off every artificial light in the room. If natural light is unavailable, use two identical LED sources positioned at 45-degree angles in front of the subject to eliminate unilateral shadows. The goal is flat, uninteresting light that illuminates the eyes, nose, and chin with exact uniformity, leaving no dark pockets for the validation algorithm to misinterpret.
2. Construct a seamless white background free of shadows
Singapore mandates a pure white background. This is a strict absolute. Off-white, cream, pale gray, and textured wallpapers all fail the contrast check. When applicants stand too close to a wall, the ambient light creates a dark halo directly behind their shoulders. Even if the wall is painted pristine white, the shadow registers as a dark gradient, and the automated cropping tool will sever the subject's shoulders from the final image.
To prevent this, the subject must stand at least 1.5 meters away from the background. This distance allows the light hitting the subject to separate cleanly from the light hitting the wall.
Practical rule: If shooting an infant, lay a pristine white sheet on the floor and shoot from directly above, rather than attempting to prop the baby up against a wall.
Reviewing passport photo requirements and renewal documentation across different regions highlights that background rules are entirely inflexible. You cannot shoot against a cluttered room and attempt to erase the background digitally later; poorly executed digital masking leaves jagged pixel artifacts around the hair that government software instantly detects and rejects.
3. Frame the subject using strict dimensional constraints
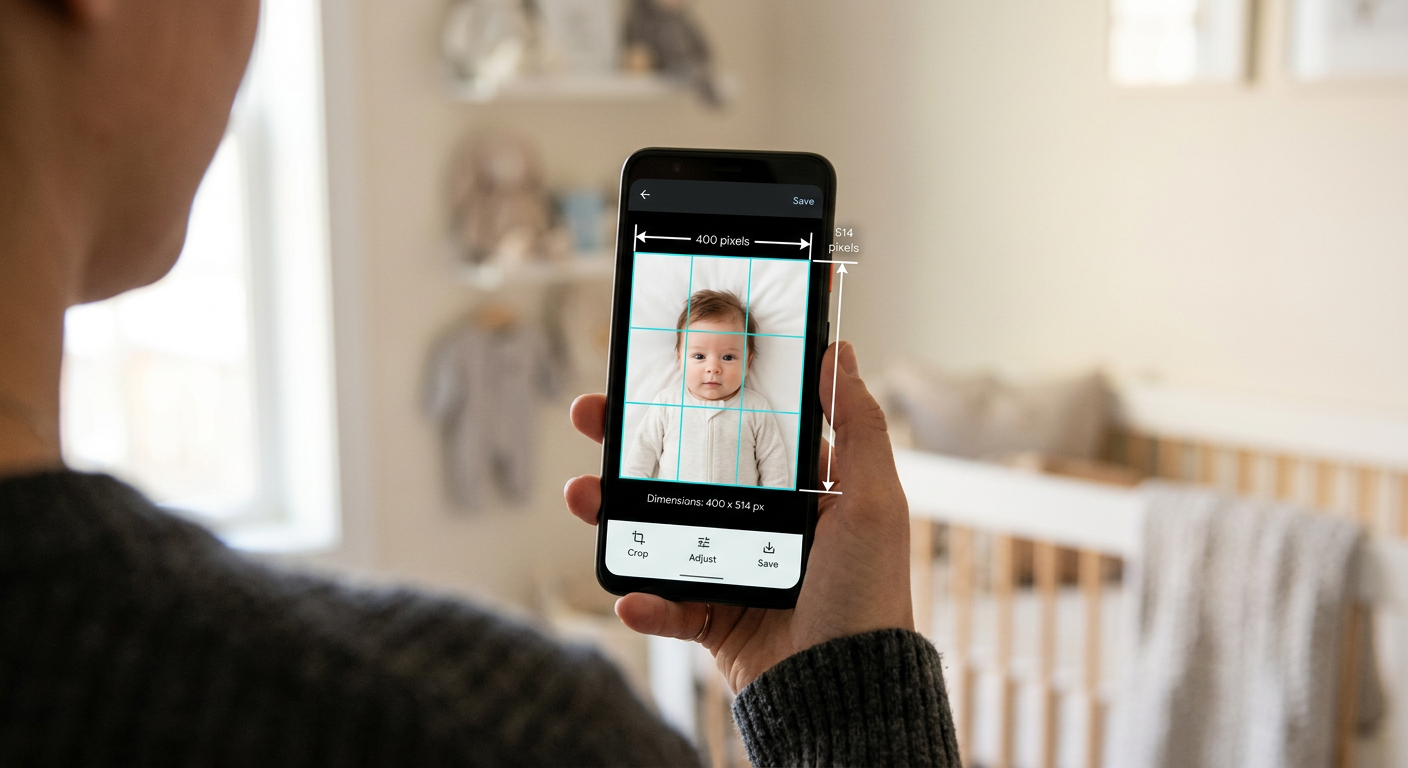
Digital framing is where the majority of technical errors occur. The ICA e-Service portal requires a specific aspect ratio, and attempting to stretch an incorrectly cropped image will distort the facial biometrics. The digital file must measure precisely 400 by 514 pixels.
If you are accustomed to navigating international applications, you will find that the parameters do not translate perfectly. While dutch passport photo requirements enforce a physical 35x45 mm format with specific shoulder framing, and an italian passport photo size evaluates facial centering differently, or brazilian passport photo requirements demand their own distinct background configurations, Singapore relies heavily on a digital-first validation matrix. For physical prints, the head must occupy between 25 mm and 35 mm of the vertical space from the bottom of the chin to the crown of the head. Digitally, this translates to the face taking up the majority of the image frame. When capturing the image, always shoot wider than necessary. Leave substantial space above the head and below the collarbones. It is simple to crop a wider shot into the correct 400 by 514 pixel ratio, but it is impossible to add space to a frame that was shot too tightly.
4. Strip away biometric obstructions and normalize expressions
The facial mapping software requires clear sightlines to the primary nodal points of the face. Any obstruction breaks the map. While the ICA technically allows glasses if they do not cause glare, the most frequent failure point is the frame of the glasses obscuring the eyelid or casting a tiny shadow across the pupil. The safest approach is to remove glasses entirely.
Hair must be tucked behind the ears, and heavy bangs that touch the eyebrows should be pinned back. The expression must be entirely neutral. A smile alters the width of the cheeks and narrows the eyes, changing the biometric signature. The mouth must be completely closed. For infants, the rules remain strict but carry slight leniency regarding eye contact. However, pacifiers, hands near the face, or a parent's supporting arm visible in the frame will trigger an instant rejection. It often helps to analyze a passport photo example to see exactly how neutral the expression must be; the face should look relaxed but entirely devoid of emotion.
5. Format the digital file to survive server compression
The final hurdle is the actual file architecture. The ICA portal restricts file uploads to a maximum of 2MB, and the image must be in JPEG format. However, heavily compressing a file to meet the size limit often introduces JPEG artifacts - blocky, pixelated squares that degrade the sharpness of the eyes and the edges of the face.
When outputting the correct passport size photo in 2026, you must balance resolution with file size. Export the image at a high quality setting (typically near the upper limit in most editing software) rather than applying maximum compression. Do not apply artificial sharpening filters, as these create high-contrast halos around the head that the system flags as tampering. The file must remain in the sRGB color space; exporting in Adobe RGB or ProPhoto RGB will cause the colors to display as flat and washed out on the government servers, potentially resulting in a rejection for unnatural skin tones.
Common Pitfalls & Troubleshooting
Even when following the guidelines, subtle technical errors can cause unexpected rejections. These failures often look identical on the submission screen - a generic error message - but require entirely different fixes. The most common underlying cause is always poor background separation.
The Digital Alteration Rejection * Symptom: The portal rejects the photo with a warning about "digital manipulation" or "tampering," even if you did not use editing software. * Fix: This happens when the edge-detection algorithm cannot separate your hair from the background, often due to low contrast or excessive JPEG compression. Reshoot the image with brighter light on the background itself to create harder contrast between the subject and the wall. Never use background-removal apps that leave jagged edges.
The Shoulder Cut-off * Symptom: The automated cropping tool severs the subject's shoulders, making the head appear to float in the center of the frame. * Fix: The camera was positioned too close to the subject. Step back at least one meter and zoom in slightly to compress the background. Ensure the subject's shoulders are entirely visible in the raw frame before cropping to the 400x514 pixel ratio.
The Asymmetrical Glare * Symptom: The photo fails the facial recognition check despite being well-lit and perfectly framed. * Fix: Check the skin for hot spots. Oily skin or a harsh directional light can cause a bright white reflection on the forehead or the tip of the nose. This glare destroys the biometric data underneath it. Dab the skin with a matte cloth and move the light source further away to diffuse the beam.
The Gray Background Shift * Symptom: The background appears white to the naked eye but fails the system's background check. * Fix: Those understanding Singapore passport photo requirements often miss that a white wall unlit by a direct source registers as gray to a camera sensor. If your subject is blocking the room's main light from hitting the wall behind them, the wall will underexpose. You must ensure ambient light hits the wall independently of the subject.
FAQ
Does a newborn need their eyes open for a Singapore passport photo? Yes, the ICA requires all applicants, including infants, to have their eyes open and visible. While slight leniency is granted for infants under one year regarding a perfectly neutral expression, closed eyes will result in a rejected application.
Can I wear contact lenses in my application photo? Clear prescription contact lenses are permitted. However, colored contacts or circle lenses that alter the natural appearance or size of your iris are strictly prohibited and will cause the biometric validation to fail.
How recent must the submitted photograph be? The photo must have been taken within the last three months. Applying with an older photo, particularly for young children whose facial features change rapidly, can result in delays at border checkpoints if the physical passport does not match the traveler.
Are hair accessories or head coverings permitted? No hair accessories, headbands, or large clips are allowed. The only exception is religious headwear worn daily, but it must be pushed back to reveal the full face from the bottom of the chin to the top of the forehead, and it cannot cast shadows on the face.