How to Meet the 2026 Irish Passport Photo Requirements for Fast Approval
Most applicants assume a high-resolution smartphone camera guarantees a compliant application. In reality, the automated biometric scanning system utilized by the Department of Foreign Affairs evaluates facial geometry, background contrast, and shadow elimination above image clarity. A slight shadow under an infant's chin or a head tilted three degrees off-center will trigger an automatic rejection and cause weeks of delay. Meeting the strict irish passport photo requirements demands precise control over your lighting setup, subject positioning, and file dimensions before the image ever reaches the validation portal. This guide details the specific metrics the digital checker looks for and the physical setup required to pass them on the first attempt, focusing heavily on where standard home photography falls short of government compliance.
Quick Summary
The Irish passport photo process relies on algorithmic biometric validation rather than visual aesthetics. A compliant application requires absolute adherence to lighting, dimensions, and facial alignment.
- Digital submissions must be at least 715 pixels wide by 951 pixels high.
- Physical prints require an exact size between 35-38mm in width and 45-50mm in height.
- The face must occupy the majority of the total frame, measuring 32-36mm from chin to crown.
- Backgrounds must be a uniform light gray or white, entirely free of texture or drop shadows.
Table of Contents
- The baseline irish passport photo requirements dictate biometric approval
- 1. Eliminate shadow casting with flat directional lighting
- 2. Secure a uniform background without texture
- 3. Align facial geometry for adult and infant applications
- 4. Crop accurately to the ireland passport photo size
- 5. Validate the final irish passport photo for digital submission
- Hardware and setup failures that trigger automatic rejection
- FAQ
- Recommended Reads
The baseline irish passport photo requirements dictate biometric approval
The Irish Department of Foreign Affairs relies on a digital portal to pre-screen applications. This system applies a facial mapping algorithm that detects the precise edges of the applicant's jaw, eyes, and ears. When a photo is uploaded, the software analyzes pixel contrast to establish where the background ends and the applicant begins.
Because the system is automated, it lacks human context. A shadow on the neck is interpreted as a wider jawline. A textured background confuses the edge-detection boundaries. You are not taking a portrait; you are providing a topographical map of a human face. For a comprehensive overview of how these standards apply broadly, reviewing A Complete Guide to Irish Passport Photo Requirements for 2026 establishes a solid baseline. The core objective is removing any visual variable that the algorithm cannot process as flat, neutral facial geometry.
1. Eliminate shadow casting with flat directional lighting
Lighting is the primary reason home applications fail. The biometric algorithm requires symmetric illumination across the entire face to accurately measure the distance between facial features. A single overhead light source, typical in residential rooms, casts harsh shadows under the eyes and chin. Similarly, a bright window on only one side of the face leaves the opposite side underexposed, which the software registers as facial asymmetry.
To correct this, you must rely on flat, diffuse lighting. The most reliable setup involves facing a large window during daylight hours, allowing the natural light to hit the face directly rather than from the side. Turn off all artificial indoor lighting, as incandescent or LED bulbs mix different color temperatures with sunlight, creating a yellow or blue cast that alters the applicant's skin tone.
Practical rule: Hold a hand vertically between your light source and the applicant's face; if it casts a hard, defined shadow on the opposite cheek, the lighting is too harsh and will fail biometric scanning.
When photographing infants, positioning them safely while maintaining this light direction requires coordination. You can read more about executing this setup in How to Meet Strict Government Passport Photo Requirements at Home, which details methods for bouncing window light effectively.
2. Secure a uniform background without texture
The background in a passport image serves one mechanical purpose: providing absolute contrast to the applicant's head and shoulders. Irish standards specifically mandate a plain light gray or white backdrop. While this sounds straightforward, the execution often introduces disqualifying errors.
Textured walls, such as those with heavy paint stippling or patterned wallpaper, create micro-shadows that the scanning portal interprets as background noise. For adult applications, standing directly against a wall usually results in a hard drop shadow behind the neck. The fix involves pulling the applicant roughly 50 centimeters away from the wall. This distance allows the light to fall evenly behind them and pushes the wall slightly out of focus, smoothing any minor texture.
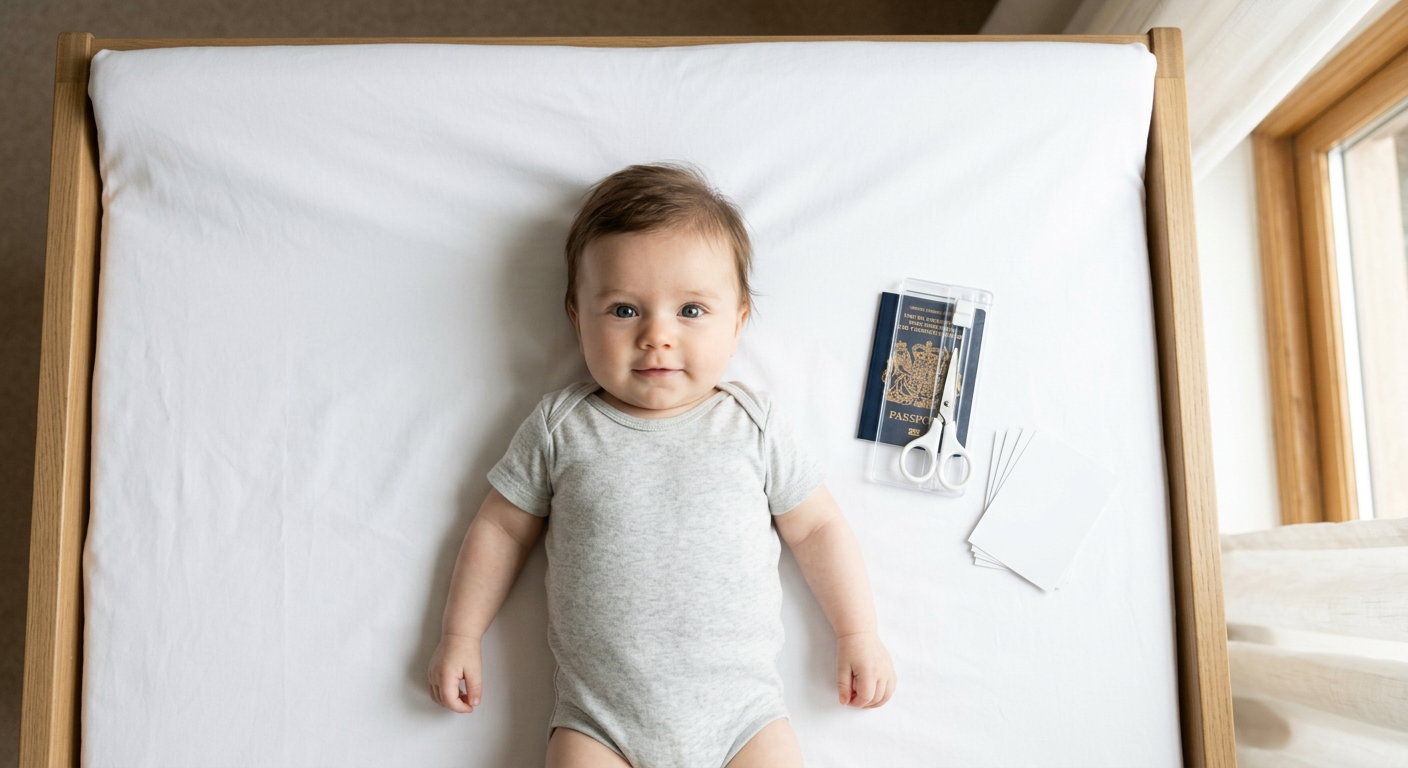
For infants, parents often lay the baby on a white bedsheet. The mistake here is failing to pull the sheet taut. Wrinkles in the fabric create deep shadows that register as secondary objects in the frame. Stretch the fabric completely flat over a firm surface, such as a changing table, before positioning the child. If the sheet is too thin, the mattress pattern underneath may show through, so use a double layer.
3. Align facial geometry for adult and infant applications
Proper alignment ensures the facial mapping software can measure the exact distance between the eyes, nose, and chin. The camera lens must sit perfectly level with the applicant's eyes.
Shooting from slightly above or below distorts the face via forced perspective. A camera angled downward at a subject elongates the forehead and minimizes the chin, changing the applicant's biometric footprint entirely. The subject must look dead center into the lens, with both ears equally visible and the chin parallel to the floor.
Infant applications present a distinct mechanical challenge here. Because newborns cannot support their own heads, parents often attempt to hold the child upright. This introduces hands and arms into the frame, resulting in immediate rejection. The most reliable method is laying the infant on a flat, white surface and shooting directly from above. The camera must remain parallel to the floor; tilting it to frame the baby better will distort their facial proportions. For those navigating the exact specifications of infant framing, Ireland Passport Photo Requirements: Official Size and Style Guide breaks down the acceptable tolerances for newborn posture, noting that infants under six months are granted slight leniency regarding eye contact and closed mouths, provided the facial geometry remains undistorted.
4. Crop accurately to the ireland passport photo size
Cropping is where raw images are converted into official documents. The physical and digital dimensions differ, but the internal proportions remain identical.
For digital uploads, the file must be at least 715 pixels wide and 951 pixels high. For physical prints, the image must measure exactly 35 to 38 millimeters wide and 45 to 50 millimeters high. Within these dimensions, the applicant's face must take up the majority of the entire frame. This is measured from the bottom of the chin to the crown of the head, which must sit precisely between 32 and 36 millimeters on a printed copy.
Manual cropping on a smartphone is highly prone to error because default photo editors do not provide millimeter rulers or precise pixel boundary constraints. An applicant may crop an image to look correct visually, only to upload it and find the head occupies too much of the frame. Automated formatting tools process the image by anchoring the eyes and chin to a fixed grid, ensuring the final cut scales perfectly to the required proportions. To understand how scaling affects the final output, How to Get the Perfect Passport Size Photo: A Step-by-Step Guide explains the exact mathematical grid used by document validators.
5. Validate the final irish passport photo for digital submission
The final step involves file integrity. The Department of Foreign Affairs requires digital uploads to be in JPEG format with a maximum file size of 9 megabytes.
A common failure occurs during file transfer. If you take a compliant photo on a smartphone and text it to a computer via WhatsApp, iMessage, or a similar messaging app, the software automatically compresses the file to save bandwidth. This compression introduces artifacting - jagged edges around the jawline and pixelation in the eyes. When the biometric scanner encounters these artifacts, it cannot establish a clean edge and rejects the image.
Always transfer the file via email using the "Actual Size" or "Original" attachment setting, or use a direct cloud storage link. Do not attempt to digitally retouch the photo to remove blemishes, red-eye, or background shadows using software. The portal's metadata scanner often detects digital manipulation layers and will flag the application as fraudulent. For a comprehensive look at submission protocols, A Comprehensive Guide to Passport Photo Requirements and Renewal Documentation for 2026 provides the exact file architecture required to pass the final checkpoint.
Hardware and setup failures that trigger automatic rejection
Navigating the digital portal often leads to generic error messages. When the system simply states the image is not compliant, applicants struggle to diagnose the root cause. These four failures share similar symptoms but require different corrections.
The focal length distortion
Smartphone cameras utilize wide-angle lenses by default. If you hold the phone too close to the applicant's face, the lens artificially swells the nose and narrows the ears, mimicking a fish-eye effect. The system rejects this for biometric failure. The fix is moving the camera at least 1.5 meters away from the subject and using the optical zoom (usually the 2x or 3x setting) to frame the face. This flattens the perspective to match a true portrait lens.
The secondary object detection
Often seen in infant photography, this occurs when a parent's finger, a pacifier string, or a patterned shirt collar enters the frame. The algorithm stops processing the face and flags the foreign object. The fix is tucking all clothing neatly below the collarbone and ensuring the infant's hands are resting comfortably outside the crop zone.
The contrast bleed
This happens when an applicant wears a white shirt against a white background. The algorithm cannot distinguish where the shoulder ends and the wall begins, resulting in a "cropping error" message. The applicant must change into a darker, solid-colored shirt to provide a hard, detectable edge for the software.
The glasses glare
While the Irish government strongly recommends removing glasses entirely, applicants who insist on wearing them often fail due to micro-reflections on the lenses. Even a tiny pinprick of light obscuring the edge of the pupil will trigger a rejection. The only reliable fix is removing the glasses completely for the photograph.
FAQ
Do infants need to have their eyes open for an Irish passport photo?
Infants under six months old are permitted to have their eyes closed. However, children over six months must have their eyes fully open and clearly visible without obstruction from hair or shadows.
Can I use a digital background replacement for my application?
The Irish Department of Foreign Affairs strictly prohibits digitally altering the background of a photograph. The subject must be photographed against a physical white or light gray background to ensure natural shadow falloff and avoid artificial edge detection issues.
What is the primary reason Irish passport photos are rejected?
Lighting inconsistencies cause the vast majority of rejections. Shadows across the face, uneven exposure from a side window, or drop shadows on the wall behind the applicant confuse the automated biometric scanners used by the portal.
Can I print my own passport photos at home for a physical application?
You can print your own photos, provided you use high-quality, glossy photographic paper and a printer capable of rendering 600 dpi without visible banding or pixelation. Standard matte paper or standard inkjet printing will be rejected by the passport office.