How to Take a Compliant US Passport Photo in 2026: 5 Steps to Guaranteed Acceptance
A common mistake when preparing for travel to the United States is assuming that a standard local 35x45 mm picture will pass muster as a us passport photo. It will not. The United States Department of State enforces a rigid 2x2 inch format, paired with biometric scanning algorithms that reject images for micro-shadows, slight background textures, or improper head positioning. The physical dimensions are only the final hurdle. Before the image is even printed, the digital file must clear a gauntlet of automated checks designed to map facial geometry precisely. Relying on a standard post office booth or an inexperienced photographer to capture these exact proportions - especially when handling infants - often results in expensive resubmissions and delayed travel plans.
Quick Summary
The US State Department demands a precisely formatted 2x2 inch (51x51 mm) image with strict biometric proportions, rejecting anything with shadows, digital filters, or incorrect head sizing.
- The head must measure exactly 1 to 1 3/8 inches from chin to crown.
- Backgrounds must be plain white or off-white with zero visible texture.
- Lighting must be entirely symmetrical to prevent automated rejection.
- Glasses, heavy retouching, and visible support structures are strictly prohibited.
- AI formatting tools offer a reliable alternative to expensive, high-risk studio visits.
Table of Contents
- Why a us passport photo fails the digital scanner
- 1. Set up a shadow-free background
- Background texture dictates digital acceptance
- 2. Master the lighting to eliminate facial shadows
- Symmetrical illumination prevents biometric distortion
- 3. Position the subject for American proportions
- Distance prevents dangerous lens distortion
- 4. Format to the exact square dimensions
- Pixel density determines print viability
- 5. Export and print without digital tampering
- Compression artifacts ruin valid images
- Common Pitfalls & Troubleshooting
- The subject's skin tone appears unnatural
- The baby's support structure is visible
- The head size falls outside the acceptable range
- FAQ
- Recommended Reads
Why a us passport photo fails the digital scanner
The US State Department does not just look at a photograph; it runs the digital file through software designed to map the structural geometry of the applicant's face. The system measures the exact distance between the pupils, the width of the jaw, and the vertical span from the bottom of the chin to the top of the head. When an image fails this automated check, human processors rarely override it.
Most rejections stem from an assumption that a clear picture is a compliant picture. A high-resolution portrait taken with a modern smartphone is often immediately rejected because computational photography features - like artificial depth of field or automated skin smoothing - interfere with the biometric map. The software interprets blurred edges around the ears or smoothed out structural lines as fraudulent digital tampering.
This rigid automated system is exactly why trying to capture a compliant image at home without understanding the mechanics ends in failure. You must build the environment to satisfy the scanner, not the human eye.
1. Set up a shadow-free background
The foundation of a compliant image is the environment directly behind the subject. The US government specifically mandates a plain white or off-white background free of shadows, patterns, and secondary objects.
Background texture dictates digital acceptance
A standard painted white wall in a residential home rarely works straight out of the camera. Depending on the paint finish and the ambient light, flat walls often photograph with a gray or blue cast, triggering a rejection. Worse, taking the photo too close to the wall causes the subject to cast a hard shadow directly behind their shoulders.
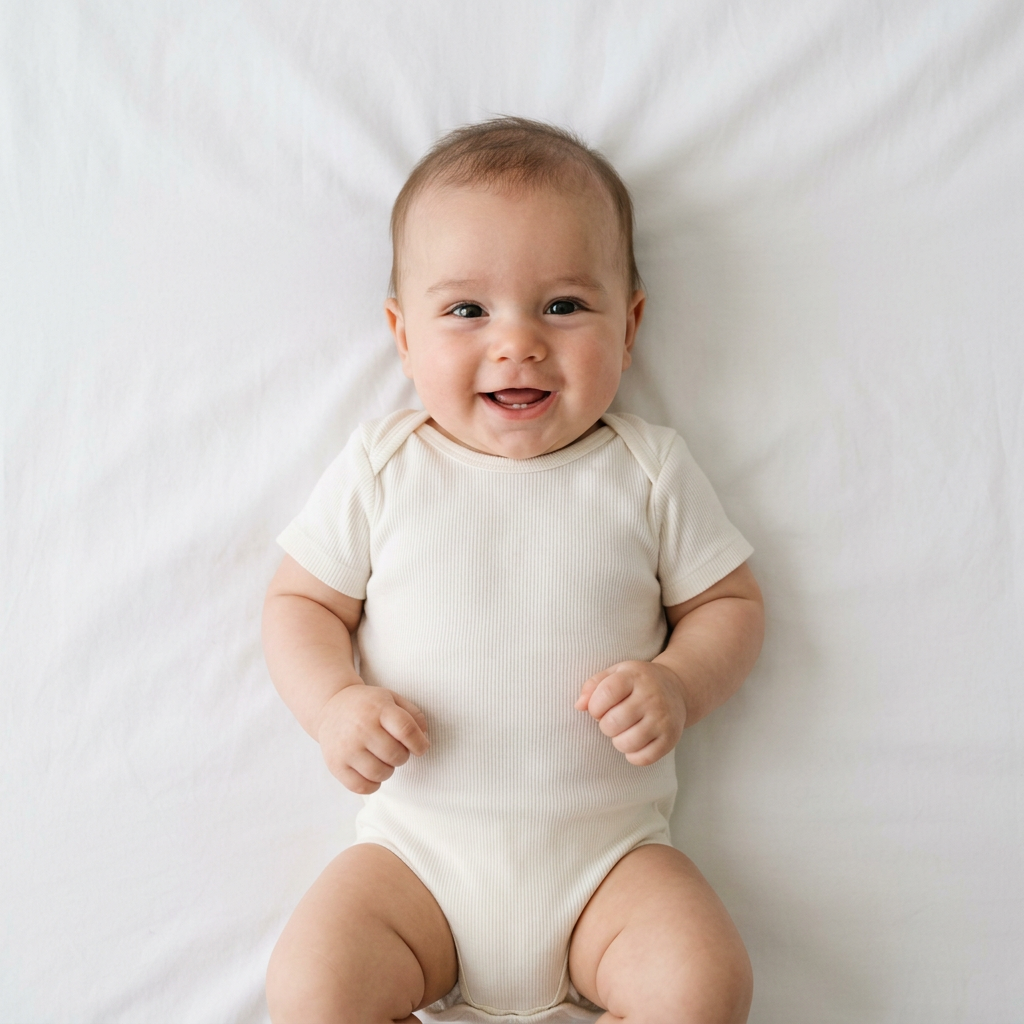
The mistake most families make, particularly when photographing infants, is laying the baby on a bedsheet that has visible creases or a subtle woven texture. The biometric scanner interprets these deep creases as secondary objects in the frame. If you cannot secure a perfectly smooth, brilliantly lit backdrop, rely on an automated system that specializes in compliant background replacement. To understand exactly how to build this setup in a living room, review How to Meet Strict Government Passport Photo Requirements at Home.
2. Master the lighting to eliminate facial shadows
Lighting is the most critical variable you control. The camera needs to register a perfectly even tone across the entire face, meaning the left cheek must be illuminated to the exact same degree as the right cheek.
Symmetrical illumination prevents biometric distortion
When light hits a face from an angle, it creates shadows under the nose, within the eye sockets, and along one side of the jaw. Automated scanners interpret a shadowed jawline as a physically narrower jaw, throwing off the biometric map entirely.
The standard error here is relying on overhead room lighting. Standard ceiling fixtures cast heavy shadows beneath the brow bone, hiding the eyes - the most critical anchor point for facial mapping. Instead, position the subject facing a large window providing indirect daylight, ensuring the light hits the face evenly from the front. Never mix window light with warm incandescent room lights, as this creates a two-tone color shift across the skin. For detailed strategies on manipulating ambient light, read How to Get the Perfect Passport Size Photo: A Step-by-Step Guide.
3. Position the subject for American proportions
The lens placement dictates the final geometry of the face. The rules demand the subject look directly into the camera with a neutral expression and both eyes open.
Distance prevents dangerous lens distortion
Smartphone cameras feature wide-angle lenses. If you hold the phone two feet from a person's face to fill the frame, the lens distorts the image - enlarging the nose and pushing the ears backward. This "foreshortening" ruins the specific american passport photo requirements for facial mapping.
To prevent this, physically step back. Position the camera at least 4 feet (1.2 meters) away from the subject, exactly at eye level.
Practical rule: Shoot wider than you need and let the software crop the image; moving the camera closer to fill the frame will distort the biometric data beyond repair.
When photographing infants, this means standing directly over them while they lie flat on a compliant surface. A common failure mode here is shooting at a slight downward angle toward the top of the head, which artificially lengthens the forehead. Ensure the camera lens is entirely parallel to the face. For specific measurements on how much of the torso should be visible before cropping, consult American Passport Photo Requirements and Size Specs.
4. Format to the exact square dimensions
The framing step is where international applicants routinely fail. You cannot simply squeeze a rectangular image into a square box.
Pixel density determines print viability
The strict american passport photo size is exactly 2x2 inches (51x51 mm). Within that square, the head must sit centered, measuring between 1 inch and 1 3/8 inches (25-35 mm) from the bottom of the chin to the top of the hair. This leaves very little margin for error. If the head measures 36 mm, the application is rejected.
Attempting to crop this manually using standard phone software almost always leads to incorrect head proportions. Furthermore, the digital file must hold a minimum resolution of 600x600 pixels to survive the transition to physical print without turning blurry. If you crop too deeply into a wide shot, you destroy the pixel density, resulting in a grainy image that fails the quality check. Instead of risking a manual crop, leverage systems built specifically to measure these ratios. See 7 Best Tools for Getting Passport Photos Online in 2026 to evaluate the platforms capable of hitting these exact metrics.
5. Export and print without digital tampering
The final hurdle is moving the formatted image from your device to the physical paper or the online portal without degrading the file.
Compression artifacts ruin valid images
The US State Department strictly forbids digital retouching. This includes red-eye removal, background blurring, and skin softening. However, many people inadvertently degrade their images by sending them through messaging apps like WhatsApp or iMessage before printing. These apps compress image files heavily to save bandwidth, introducing digital noise and jagged edges (artifacts) that the scanner registers as a low-quality or manipulated image.
To avoid this, save the finished JPEG directly to your local files or transfer it via email at its "Actual Size." When printing the physical copies at a local kiosk, you must use high-quality photo paper (matte or glossy). Standard printer paper is an instant rejection. If you use a dedicated AI formatting service trusted by over 11 million customers worldwide, you receive a perfectly sized 4x6 inch template file containing two 2x2 inch images, which prints accurately at any standard photo lab without scaling issues.
Common Pitfalls & Troubleshooting
When a US passport application is held up for photo issues, the notification rarely provides specific instructions on how to fix the problem. These three failures look similar from the outside but require entirely different interventions.
The subject's skin tone appears unnatural
Symptom: The rejection letter claims the image is heavily retouched or features incorrect color balance. Fix: This is almost always caused by an automatic smartphone filter. Modern phones often apply a "beauty mode" or "HDR enhancement" that smooths skin textures and artificially boosts contrast. Turn off all HDR and portrait modes in your camera settings before shooting. The camera must act as a dumb lens capturing raw reality, not a smart device trying to make the subject look better.
The baby's support structure is visible
Symptom: The photo is flagged for secondary objects or background interference. Fix: When laying an infant on a white sheet, parents frequently place their hands under the fabric to support the neck, or leave the edges of a car seat visible. The State Department allows no hands, no pacifiers, and no structural supports in the frame. The most effective fix is to lay the baby entirely flat on a padded floor covered by a smooth sheet, eliminating the need to physically hold them.
The head size falls outside the acceptable range
Symptom: The online validator or processing agent states the head is too large or too small for the frame, despite the overall image being exactly 2x2 inches. Fix: The applicant manually cropped the photo without measuring the physical face. The system measures from the bottom of the solid chin to the top of the actual head - excluding voluminous hair. You must measure this axis precisely. For an in-depth breakdown of how to calculate this, see How to Get the Correct Passport Size Photo in 2026: Official Guidelines and Standards. This is the most frequent cause of rejection and the primary reason we do not recommend using standard photo booths for complex infant photography.
FAQ
Can you wear glasses in a US passport photo?
No. The US State Department completely banned eyeglasses in passport photos in 2016 to improve facial recognition accuracy. Even if you wear glasses daily, you must remove them. The only exception is a verified medical condition preventing removal, which requires a signed doctor's statement submitted alongside the application.
Can you take an infant's photo while they sleep?
No. The regulations mandate that the applicant's eyes must be fully open and looking directly at the camera. While newborns are granted slight leniency regarding a perfectly neutral expression, closed eyes remain a hard stop for the automated processing systems.
Are there differences between a physical and a digital application photo?
While the biometric proportions and square ratio remain identical, the medium dictates the file requirements. A digital upload for a renewal or visa must be a JPEG between 54 KB and 10 MB, sized at least 600x600 pixels. A physical application requires two identical 2x2 inch prints on dedicated photo paper. To navigate the specific paperwork demands, read A Comprehensive Guide to Passport Photo Requirements and Renewal Documentation for 2026.
Can I wear uniforms or hats?
Uniforms, clothing that looks like a uniform, and camouflage attire are prohibited. You must wear normal daily clothing. Hats and head coverings are equally banned unless worn daily for religious or medical purposes, in which case the applicant must submit a signed statement confirming the specific exemption.