Understanding Passport Photo Rules: Avoiding Common Rejection Pitfalls in 2026
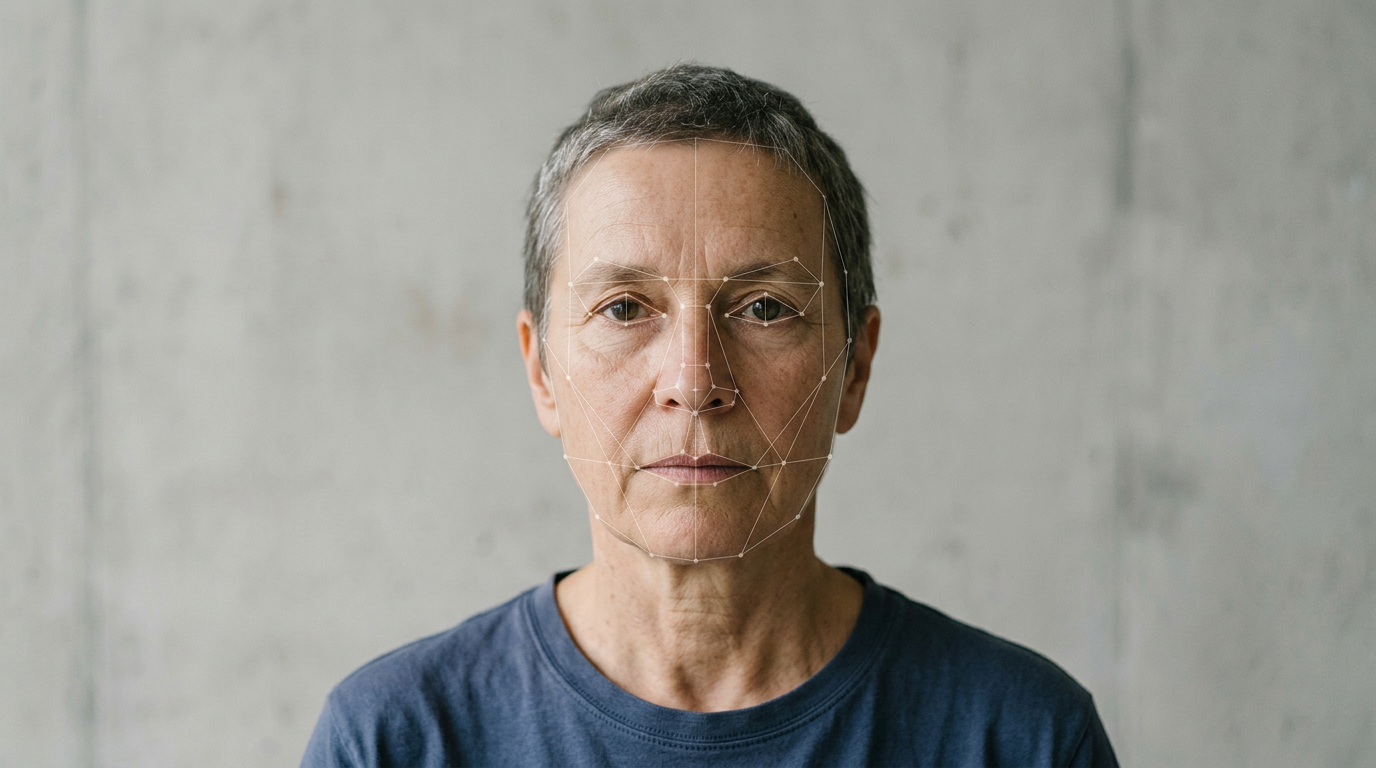
Imagine standing at a busy processing counter, wrestling your six-month-old into a forward-facing gaze, only to receive a rejection letter three weeks later because a faint shadow fell across their left ear. Rejections rarely happen because an applicant wore the wrong color shirt; they happen because modern biometric scanners read images as a topographical map, not a portrait. The system looks for precise mathematical distances between the eyes, nose, and chin. Understanding these passport photo rules prevents the delay of a canceled travel itinerary and the expense of starting the application process all over again. A compliant image is a biometric data file disguised as a photograph, requiring precise alignment, lighting, and unaltered formatting to pass automated government scans. Rather than treating the document as a mere formality, applicants must approach the camera as a precise measuring tool.
Quick Summary
A compliant travel document image relies entirely on strict biometric mapping, requiring absolute precision in facial alignment, background isolation, and lighting to pass automated algorithmic reviews.
- Government scanning software measures exact facial proportions, automatically failing images with tilted heads or obscured features.
- Invisible background gradients and drop shadows are the leading causes of automated document rejection.
- Capturing infants requires specific physical support techniques to meet strict geometric standards without introducing foreign objects into the frame.
- Digital editing, including simple background removal without proper algorithmic tools, alters pixel metadata and invalidates the document.
Table of Contents
- Why strict passport photo rules trigger automatic rejections
- How facial geometry dictates the passport id photo frame
- Where background shadows ruin an otherwise perfect shot
- When digital alterations cross the line into fraud
- How infant passport photos break standard compliance checks
- What to measure before submitting your application
- Why printer technology dictates physical document acceptance
- FAQ
- Recommended Reads
Why strict passport photo rules trigger automatic rejections
Governments no longer rely exclusively on human clerks to judge whether a picture looks like the applicant. Modern processing facilities feed digital files and scanned physical prints through automated biometric validation software before a human ever views the application. This software evaluates the image by mapping over one hundred specific facial nodes, translating your physical appearance into a digital template. If the software cannot definitively map these points, the system automatically triggers a rejection.
The primary mechanism driving these rejections is an unreadable interpupillary distance. The software anchors its entire map on the exact distance between the center of your left pupil and the center of your right pupil. If your head is tilted up or down by even five degrees, the two-dimensional distance between your eyes and your chin compresses. The software interprets this compression as an anatomical impossibility rather than a camera angle, failing the image instantly. Reading a detailed breakdown of passport photo rules and requirements shows how consistently this specific failure mode catches applicants off guard.
To check your own image before submission, lay a straight edge across the photo horizontally. The line connecting the centers of both eyes must be perfectly parallel to the bottom edge of the frame. If one eye sits even a millimeter higher than the other, the head tilt will likely cause the biometric software to miscalculate your jawline, leading to an automatic refusal.
How facial geometry dictates the passport id photo frame
The visible frame of a passport id photo exists solely to give the facial geometry proper context. The space around the head is just as strictly regulated as the face itself. Governments mandate specific head-height ratios to ensure that when the software zooms in to analyze the iris structure, the resolution remains high enough to capture the necessary data. A face positioned too far back in the frame lacks the pixel density required for biometric mapping, while a face too close to the lens distorts the physical width of the nose.
Consider the exact measurements required by the United States: the head must measure between 1 and 1 3/8 inches from the bottom of the chin to the top of the hair. If the applicant has voluminous hair that extends beyond the top edge of the frame, the software cannot calculate the total volume of the head. Conversely, leaving too much dead space above the hair forces the facial features into a smaller pixel area. Understanding how to scale images correctly is critical when comparing international standards, such as navigating the exact photo dimensions for Indian passport applications.
Practical rule: Always measure the physical distance from the bottom of the chin to the crown of the head before cropping, ensuring the face occupies exactly 70 to 80 percent of the total vertical space.
Where background shadows ruin an otherwise perfect shot
The requirement for a "plain white or off-white background" is the most misunderstood mandate in document processing. An off-white wall is not a compliant background if the lighting casts a drop shadow behind the applicant's neck. Biometric mapping software does not possess the contextual awareness to separate a dark gray shadow from dark brown hair.
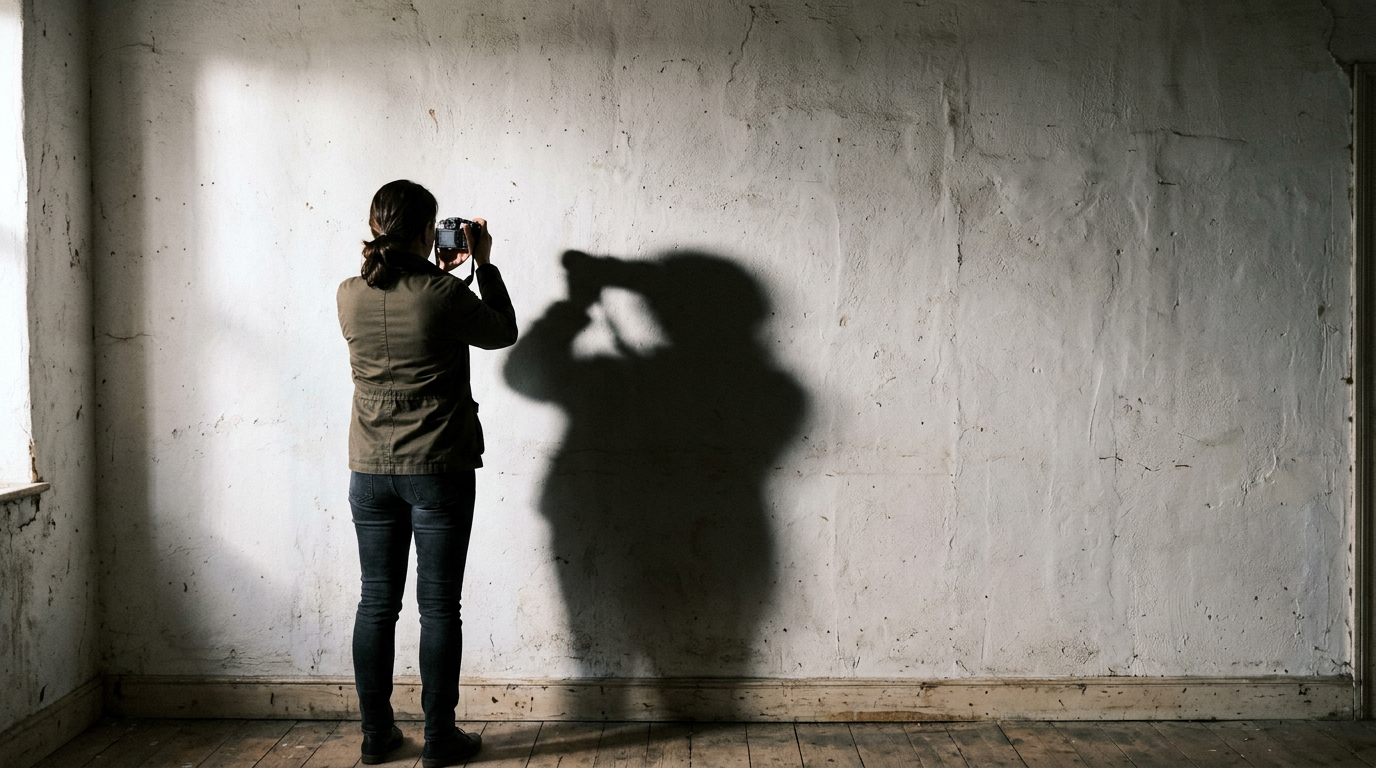
There are two distinct types of lighting failures that ruin applications: cast shadows and modeling shadows. Cast shadows occur when the applicant stands too close to the background wall, causing the primary light source to project their silhouette onto the surface behind them. The software interprets this silhouette as a physical extension of the head, distorting the calculated shape of the skull. Modeling shadows occur on the face itself, typically when a single overhead light illuminates the forehead but casts deep darkness under the nose and chin. Because the software reads dark pixels as physical depth, a heavy shadow under the eye is mapped as a deep structural cavity.
To diagnose your lighting setup today, take a test shot and look specifically at the boundary where the shoulder meets the background, and the crease where the nose meets the cheek. If you cannot clearly define the absolute edge of the shoulder, or if one side of the nose is significantly darker than the other, you must move further away from the wall and introduce a second light source to fill the shadows. Reviewing understanding the core passport photo criteria reinforces how lighting dictates software acceptance.
When digital alterations cross the line into fraud
The temptation to fix a shadow or a messy background using consumer photo editing software is high, but manual digital alteration is classified by border agencies as document manipulation. Using a digital eraser tool to remove a busy living room background and replace it with pure white leaves distinct, measurable artifacts in the image file.
When a human manually clips out a background, the interpolation of pixels at the boundary of the hair creates a jagged, unnatural edge known as aliasing. Government software is specifically trained to detect aliasing and mismatched noise profiles. Every digital camera sensor produces a unique pattern of digital noise across the image. If the noise pattern on the face does not match the completely noise-free white background you digitally inserted, the system flags the file as manipulated. This is why relying on specialized passport photo template tools that use compliance-trained AI is fundamentally different from manually erasing pixels in standard design software.
You can test a digital file for obvious manipulation by zooming in on the image until you can see individual pixels. If the transition from the edge of the hair to the background consists of a sharp, blocky line with no natural blending, the image will likely be rejected for unauthorized digital alteration.
How infant passport photos break standard compliance checks
Infants under six months old present the most difficult challenge in document photography because they lack the cervical spine control required to sit upright and face a camera perfectly parallel to the lens. The standard rules of posture simply cannot apply, yet the geometric requirements of the biometric software remain largely unchanged.
When parents attempt to hold an infant up for the camera, the parent's hands inevitably intrude into the frame, or the parent's clothing becomes the background. Both scenarios trigger immediate rejection. Laying the infant on the floor on top of a white bedsheet is a common workaround, but fabric inherently creates wrinkles and folds. The overhead lighting catches these folds, creating deep gray shadows that violate the plain background rule.
The mechanism to solve this involves manipulating the environment rather than the infant. By covering a firm, angled surface with a taut piece of heavy white poster board, the parent can securely recline the baby while entirely eliminating fabric shadows. Finding effective methods to photograph a newborn requires abandoning standard portrait logic and treating the setup like a flatbed scanner. Check your infant photo specifically for hands, pacifiers, and the visible edges of car seat straps; any foreign object intersecting with the infant's face or shoulders guarantees a failed application.
What to measure before submitting your application
Physical and digital specifications vary drastically depending on the issuing country. Submitting a perfectly lit, biometrically accurate photograph will still result in rejection if the physical crop does not match the jurisdiction's specific millimeter mandates.
The variations primarily dictate how tight the frame is around the face. The United States requires a relatively wide crop (2 x 2 inches), leaving significant white space around the subject. In contrast, standard European and Australian requirements demand a tighter crop (35 x 45 mm), where the face dominates the frame. Applying an American crop to a European application means the biometric software will read the head size as physically too small, failing the validation process.
| Jurisdiction | Physical Dimensions | Head Size Requirement | Background Color |
|---|---|---|---|
| United States | 2 x 2 inches (51 x 51 mm) | 1 to 1 3/8 inches | Pure white or off-white |
| United Kingdom | 35 x 45 mm | 29 to 34 mm | Cream or light grey |
| Australia | 35 to 40 mm wide x 45 to 50 mm high | 32 to 36 mm | Plain white or light grey |
| Schengen Area | 35 x 45 mm | 32 to 36 mm | Light grey or white |
Before submitting physical prints, use a millimeter ruler to verify that the face size fits exactly within the required parameters. Confirming current Australian passport photo guidelines or your specific country's rules ensures the physical cut matches the digital reality.
Practical rule: Never print international document photos on standard home office paper; biometric scanners require the specific reflective index of professional-grade glossy or matte photographic paper.
Why printer technology dictates physical document acceptance
When applications require physical prints, the mechanism of printing is just as heavily scrutinized as the subject matter. Standard home inkjet printers deposit microscopic droplets of cyan, magenta, yellow, and black ink onto the paper in a pattern called halftoning. While this looks acceptable to the naked eye, a high-resolution government scanner magnifies these distinct dots.
The biometric software confuses the inkjet dot pattern with physical skin textures, moles, or blemishes, corrupting the facial map. Professional processing centers use dye-sublimation printers, which use heat to transfer dye onto the paper in a continuous tone, eliminating the dot pattern entirely. If you are printing your own images, the presence of micro-banding - faint horizontal lines caused by an inkjet printhead - will trigger a manual review and likely a rejection.
You can easily verify your print quality at home. View your printed image under a magnifying glass or a macro smartphone lens. If the skin tones are made up of tiny, distinct colored dots rather than smooth, continuous color gradients, the print lacks the structural integrity required for official document scanning. You must reprint the file using a dye-sublimation kiosk or a professional printing service that outputs true continuous-tone photographs.
FAQ
What is the most common reason for a biometric photo rejection?
Shadows on the face or background are the leading cause of rejection. Biometric software interprets dark areas as physical depth, which distorts the digital map of your facial structure.
Can I wear prescription glasses in a modern travel document picture?
In almost all major jurisdictions, glasses are strictly prohibited. The lenses create glare that obscures the exact shape of the iris, and the frames often cast micro-shadows across the cheekbones.
How strict are the rules for infant facial expressions?
Governments generally relax the strict "neutral expression" rule for infants under one year old. However, the child's eyes must remain clearly visible, and the mouth should be closed if possible to avoid distorting the jawline measurement.
Does a digital background replacement guarantee acceptance?
No. Manually erasing a background in standard editing software leaves pixelated edges that government algorithms detect as fraudulent manipulation. Only AI systems explicitly trained on government biometric standards can replace backgrounds without corrupting the file's integrity.
Can I print my own application pictures on a home printer?
Standard inkjet printers are generally insufficient because they print in microscopic dots that confuse scanners. You must use a dye-sublimation printer and exact photographic paper to meet the continuous-tone requirements.