How to Capture a Compliant Digital Passport Photo in Australia for 2026
The most common misconception about taking a digital passport photo in Australia is that a white wall and a modern smartphone guarantee a compliant image. In reality, the Australian Passport Office rejects thousands of applications every month not because the camera quality was poor, but because the lighting created a faint drop shadow behind the applicant's ear, or the software automatically smoothed the skin texture. Securing a compliant digital passport photo in Australia requires treating your smartphone like a biometric scanner rather than a portrait camera. Every pixel must serve the facial recognition software that will eventually process the image.
Quick Summary
Capturing a compliant digital passport photo for Australian applications involves controlling ambient light, maintaining precise camera distance, and formatting the file to strict biometric dimensions without applying digital alterations.
- Position the subject 1.5 meters from the camera and 50 centimeters from the background to eliminate drop shadows.
- Use diffused, indirect natural light rather than the camera's flash or overhead room lighting.
- Ensure the final image file is an uncompressed JPEG under 5MB, with the head measuring between 32mm and 36mm from chin to crown.
- Never use portrait mode, beauty filters, or automated background removal tools that alter the original edge of the subject's hair or face.
Table of Contents
- 1. Setting Up Your Space for Even Lighting
- 2. Positioning the Subject and the Camera
- 3. Capturing the Right Expression and Posture
- 4. Cropping and Formatting to Australian Standards
- 5. Reviewing the Digital File Requirements
- 6. Choosing a Submission or Printing Method
- Common Pitfalls & Troubleshooting
- FAQ
- Recommended Reads
1. Setting Up Your Space for Even Lighting
Lighting is the single most frequent cause of passport photo rejection. The Australian Passport Office requires uniform illumination across the face and the background, which means shadows of any kind - whether under the chin, behind the ears, or cast onto the wall - will render the image invalid. The mechanics of biometric scanning rely on mapping the exact distance between facial features. When a shadow obscures the edge of the jawline or the depth of the eye sockets, the software cannot accurately plot those points.
To achieve this, you must rely on diffused, indirect natural light. The ideal setup involves facing a large window on an overcast day, or standing in a room with plenty of ambient light where the sun is not directly hitting the subject's face. Overhead lighting in homes typically casts harsh shadows under the eyes and nose, while a camera flash creates a harsh drop shadow on the wall behind the subject.
The mistake people actually make here is attempting to fix poor lighting by turning on every lamp in the room. This creates multiple light sources with different color temperatures (warm yellow bulbs mixing with cool daylight), which confuses the camera's white balance and results in unnatural skin tones. If you cannot find a spot with even natural light, you must wait for a better time of day rather than forcing the shot with artificial room lighting.
2. Positioning the Subject and the Camera
Distance and angle dictate the geometry of the face in the final image. If the camera is too close, the lens will distort the facial features, making the nose appear larger and the ears smaller - a phenomenon known as barrel distortion. If the camera is positioned too high or too low, it alters the perceived shape of the jaw and forehead, which again interferes with biometric mapping.
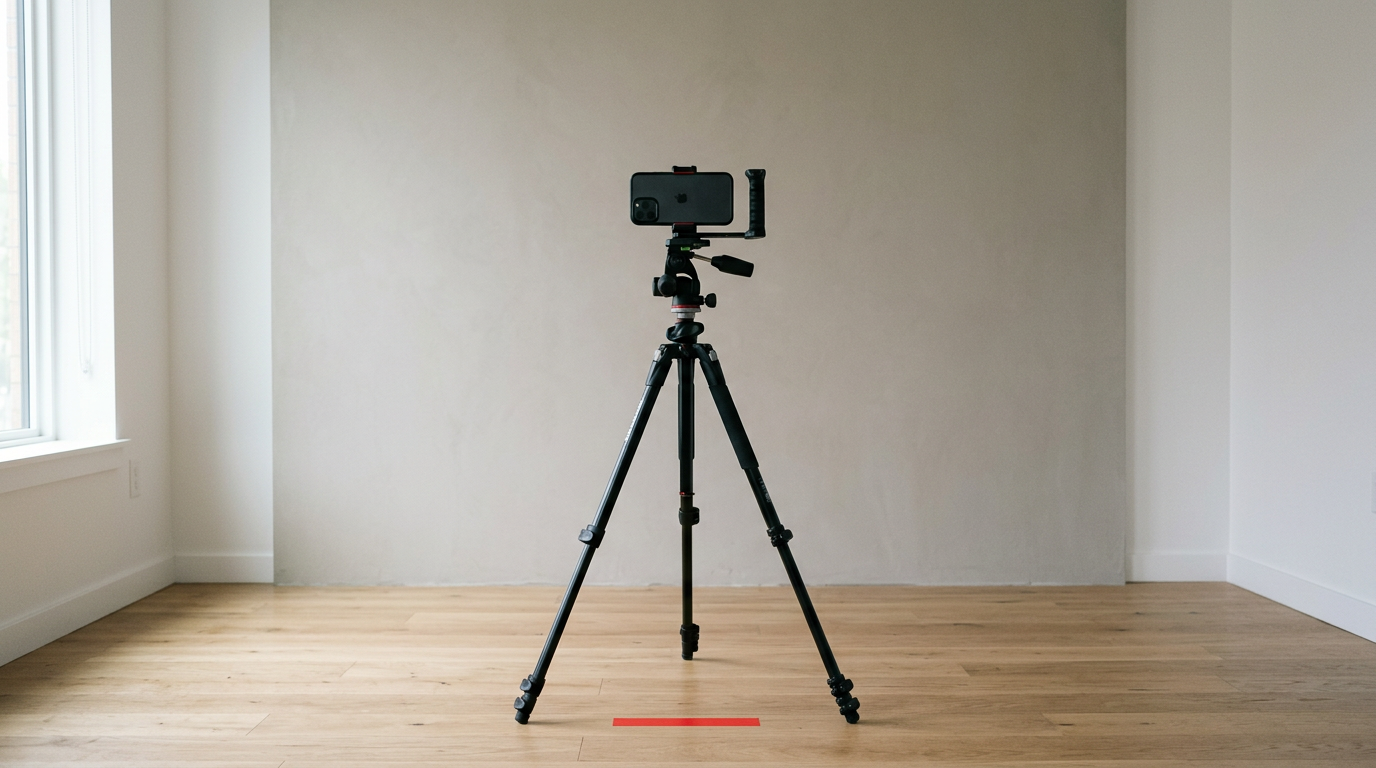
The subject must stand or sit approximately 50 centimeters away from a plain white or light grey background. This gap is crucial because it allows ambient light to fall behind the subject, eliminating the sharp drop shadow that occurs when someone leans directly against a wall. The camera should be positioned exactly at the subject's eye level, approximately 1.5 meters away. At this distance, a standard smartphone lens captures the face with minimal distortion.
Practical rule: Always use the rear-facing camera of your smartphone, never the front-facing selfie camera, as selfie lenses use wider angles that inherently distort facial proportions.
Attempting to hold the phone yourself during this step immediately compromises the shot geometry. Even with a long arm, holding the phone forces the shoulder up and angles the camera slightly downward, breaking the requirement for a perfectly square, eye-level shot. You must have another person take the photo or use a tripod. If you are trying to figure out how to optimize a digital passport photo Australia demands in 2026, getting the physical camera position right is the foundation.
3. Capturing the Right Expression and Posture
The Australian government mandates a neutral expression with the mouth closed and eyes open, looking directly at the camera. This requirement exists because facial recognition algorithms measure the resting distances between the pupils, the corners of the mouth, and the bottom of the chin. Smiling raises the cheeks, narrows the eyes, and stretches the mouth, changing all of these critical measurements simultaneously.
The subject must face the lens squarely. Both edges of the face must be visible equally, meaning the head cannot be tilted up, down, or rotated to the side even slightly. Hair must be tucked behind the ears so the jawline is fully visible from the earlobe to the chin. Glasses should be removed entirely; while the rules technically allow prescription glasses in rare medical circumstances, the risk of glare on the lenses or the frames obscuring the eye sockets makes removing them the only reliable approach.
The mistake applicants make here is telling the subject to "relax." A completely relaxed face often results in half-closed eyes or a slightly slouched posture. The correct instruction is to sit up perfectly straight, look directly into the center of the lens, and close the lips without clenching the jaw. When photographing infants or toddlers, achieving this is notoriously difficult, which is why parents often rely on a specialized passport photo app australia to extract a compliant frame from a brief moment of stillness.
4. Cropping and Formatting to Australian Standards
Once you have captured the raw image, it must be cropped to precise biometric dimensions. Australian passport photos must be between 35mm and 40mm wide, and between 45mm and 50mm high. More importantly, the size of the head within that frame is strictly regulated: the distance from the bottom of the chin to the crown of the head (excluding hair) must measure between 32mm and 36mm.
The mechanics of this cropping require leaving appropriate negative space above the head and ensuring the eyes are positioned in the upper half of the photograph. You cannot simply use the default crop tool on your phone without a millimeter grid. You need software that overlays a biometric template to guarantee the chin and crown fall within the acceptable millimeter ranges.
The critical mistake people make during this phase is cropping the image too tightly before applying the final format. If you zoom in too much on the original photo, you restrict the formatting tool's ability to center the face and leave the required blank space around the head. Always capture the subject from the chest up, leaving plenty of space above the head and to the sides. This gives you the necessary margin to adjust the framing when you use tools designed for an australian passport photo online.
5. Reviewing the Digital File Requirements
The digital file itself must meet specific technical criteria before it can be submitted or printed. The Australian Passport Office requires a high-quality JPEG file. It must not be heavier than 5MB, but it must contain enough resolution to print clearly at 600 dots per inch (dpi). The image must be in color, completely unretouched, and free from compression artifacts.
Retouching is strictly forbidden. This means you cannot use software to remove blemishes, smooth skin, whiten teeth, or digitally replace the background. Even if a background removal tool replaces a cluttered room with a perfectly pure white backdrop, the algorithm often leaves a jagged, unnatural edge around the hair or shoulders. Government scanners detect these digital artifacts instantly and reject the photo on the grounds of manipulation.
Improper sharing of the completed image file frequently destroys its digital quality before upload. If you take the photo on a smartphone and text it to yourself, or send it via WhatsApp or Facebook Messenger, the messaging app automatically compresses the file to save data. This compression creates microscopic pixel blocks that ruin the image's sharpness. You must transfer the original file via email (selecting 'Actual Size') or via a direct cable transfer when preparing your application photo for a passport: digital resolution and format checks.
6. Choosing a Submission or Printing Method
Once your digital file is captured and formatted, you must decide how to physically or digitally submit it. Some online renewal processes allow you to upload the digital file directly, while new applications often require printed copies. If you need physical prints, the image must be printed on high-quality, glossy photographic paper without any ink smudges, heavy textures, or borders.
Many applicants prefer the security of retail verification. Taking your formatted digital file to an australia post digital passport photo service or printing an officeworks digital passport photo allows you to transfer the digital file onto compliant photographic paper. These retailers use dye-sublimation printers that produce the continuous tones required for biometric scanning, rather than the dotted ink patterns produced by home inkjet printers.
The mistake people make at this stage is printing the photos at home on standard copy paper or cheap matte photo paper. Home inkjet printers almost always fail the government's quality standards because the ink bleeds slightly into the paper fibers, reducing the sharpness of the facial features. Unless you own a professional-grade photo printer, it is vastly safer to format the digital passport photos australia requires at home, and then pay the small fee to have that specific file printed on commercial glossy stock.
Common Pitfalls & Troubleshooting
Several failures look identical from the outside - an application rejected due to "unacceptable photo quality" - but stem from entirely different root causes. Here is how to diagnose and fix the specific issues.
Symptom: The rejection notice cites "shadows or uneven lighting." Diagnosis 1: Drop Shadows. The background is bright, but there is a dark outline behind one side of the face or neck. This means the subject was standing too close to the wall. Fix: Move the subject at least 50 centimeters away from the wall to let light fall behind them. Diagnosis 2: Feature Shadows. One side of the nose is darker than the other, or the eye sockets look hollow. This is caused by a strong light source coming from one side or directly above. Fix: Turn the subject so they directly face the primary light source (like a window), ensuring both sides of the face are illuminated equally.
Symptom: The rejection notice cites "image manipulated or altered." Diagnosis 1: Digital Background Removal. The background is pure white, but the edges of the hair look strangely sharp or jagged. Fix: Reshoot against a physical, plain light-grey or white wall. Never use a digital background replacement tool for Australian applications. Diagnosis 2: Beauty Filters. The skin looks completely smooth with no visible pores. This is most often the real cause when modern smartphones are used, as many Android devices apply subtle skin smoothing by default. Fix: Disable all "portrait," "beauty," or "AI enhancement" modes in your camera settings before taking the photo.
Symptom: The rejection notice cites "incorrect proportions." Diagnosis: The head size does not fall between 32mm and 36mm on the printed photo. Fix: Do not manually stretch or scale the image before printing. Use a dedicated formatting tool that locks the biometric template in place before generating a 4x6 inch print sheet containing the properly sized passport photos.
FAQ
Can I wear makeup in my digital passport photo?
Yes, you can wear everyday makeup, provided it does not alter your natural facial features. Heavy contouring that changes the perceived shape of your cheekbones or jawline can cause the photo to fail biometric matching against your actual face.
Do I need to show my ears in an Australian passport photo?
The rules state that your jawline must be clearly visible from the earlobe to the chin. While the ears themselves do not strictly have to be fully exposed, your hair must be pushed back so that no part of the face or the edge of the jaw is covered.
Can babies have their eyes closed in a passport photo?
Infants under the age of one are permitted to have their eyes closed, though open eyes are preferred. Infants under three years old are also permitted to have their mouths slightly open. However, no hands, toys, or supporting arms may be visible in the frame.
What color should the background be for Australian applications?
The background must be plain white or light grey. It cannot contain any patterns, textures, wall joints, or door frames. It must be a solid, uniform color that contrasts clearly with the subject's face and clothing.
Can I wear a white shirt in my passport photo?
It is strongly advised against. Because the background must be white or light grey, wearing a white shirt causes your shoulders to blend into the background. You should wear a colored shirt to provide a distinct contrast between your body and the backdrop.